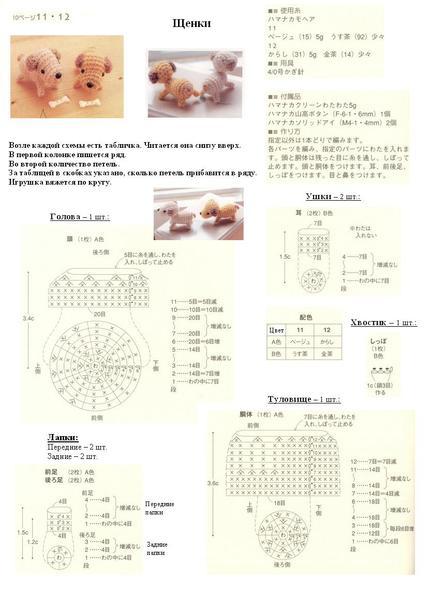
We offer a description of crocheting a cute dog. It will be a great gift for both children and adults.
You will need 4 colors of yarn - beige for the body, a second color for the ears, tail and nose (blue in the description), black and white for the eyes.
You will also need a hook suitable for the thickness of the yarn, stuffing material, felt circles for decorating the paws, a sewing needle and scissors.
Knitting description:
The toy is knitted in a spiral using single crochets on both sides of the loop. Remember the rule of knitting amigurumi - the first 2-3 rows are knitted counterclockwise, then the knitting is turned inside out, the initial tail of the thread remains inside, and the toy is knitted clockwise.
Head
2nd row: 6 increases (12 sc)
12 - 15 row: sc in circle (66)
Row 16: 31 sc, decrease, repeat 2 times (64)
Row 17: sc (64)
Row 18: 30 sc, decrease, repeat 2 times (62)
Row 19: sc (62)
Row 20: 29 sc, decrease, repeat 2 times (60)
Row 21: sc (60)
Row 22: 28 sc, decrease, repeat 2 times (58)
Row 23: sc (58)
Row 24: 27 sc, decrease, repeat 2 times (56)
Row 25: 12 sc, decrease, repeat 4 times (52)
Row 26: 11 sc, decrease, repeat 4 times (48)
Row 27: 6 sc, decrease, repeat 6 times (42)
Row 28: 5 sc, decrease, repeat 6 times (36)
29 - 34 row: sc (36)
Stuff the toy's face with stuffing.
Row 35: 5 sc, increase, repeat 6 times (42)
Row 36: 6 sc, increase, repeat 6 times (48)
37 - 41 row: sc (48)
Row 42: decrease, 6 sc, repeat 6 times (42)
Row 43: decrease, 5 sc, repeat 6 times (36)
Row 44: decrease, 4 sc, repeat 6 times (30)
Row 45: decrease, 3 sc, repeat 6 times (24)
Row 46: decrease, 2 sc, repeat 6 times (18)
Row 47: decrease, 1 sc, repeat 6 times (12)
Row 48: decrease 6 times (6)
Fill your head completely with filler.
Eyes
Using black thread, knit 6 sc into an amigurumi ring. Tighten the thread, leaving a tail for sewing. Connecting two such details is the pupils.
2nd row: increase 6 times (12)
Row 3: increase, 1 sc, repeat 6 times (18)
4th row: sc (18)
Row 5: decrease, 1 sc, repeat 6 times (12)
Next, tie 2 eyelids with beige thread:
1st row: 6 single crochets (sc) in a magic amigurumi ring.
2nd row: 6 increases (12 sc)
3rd row: 1 increase, 1 sc, repeat 6 times (18)
4th row: 1 increase, 2 sc, repeat 6 times (24)
Tighten the thread, leaving a tail for sewing.
Sew the eyelids to the head, you can add a little filler inside if desired. Sew on the whites and pupils with a slight offset so that the eyelid can be seen from above.
1st row: 4 sc in amigurumi ring, leaving a long end of thread for embroidering the mouth.
2nd row: 1 increase, 1 sc, repeat 2 times (6)
3rd row: 1 increase, 2 sc, repeat 2 times (8)
4th row: 1 increase, 3 sc, repeat 2 times (10)
Row 5: 1 increase, 4 sc, repeat 2 times (12)
Row 6: 1 increase, 5 sc, repeat 2 times (14)
Row 7: 1 increase, 6 sc, repeat 2 times (16)
Row 8: 1 increase, 7 sc, repeat 2 times (18)
Row 9: 1 increase, 8 sc, repeat 2 times (20)
Tighten the thread and cut it, leaving a long end for sewing.
It turns out to be a “cap”. Make the cap flat, it will take the shape of a triangle. Sew the nose onto the toy's face using a long tail. Using the second end of the thread (which remains from the beginning of knitting), embroider the “mouth” in the form of a vertical strip from the nose to the starting point (amigurumi ring) of the head.
1st row: 6 single crochets (sc) in a magic amigurumi ring.
2nd row: 6 increases (12 sc)
3rd row: 1 increase, 1 sc, repeat 6 times (18)
4th row: sc (18)
Row 5: 1 increase, 2 sc, repeat 6 times (24)
6 - 10 row: sc (24)
Row 11: 1 decrease, 10 sc, repeat 2 times (22)
12 - 14 row: sc (22)
Row 15: 1 decrease, 9 sc, repeat 2 times (20)
16 - 18 row: sc (20)
Row 19: 1 decrease, 8 sc, repeat 2 times (18)
20 - 22 row: sc (18)
Row 23: 1 decrease, 7 sc, repeat 2 times (16)
24 - 26 row: sc (16)
Row 27: 1 decrease, 6 sc, repeat 2 times (14)
Row 28: 1 decrease, 5 sc, repeat 2 times (12)
Row 29: 6 decreases (6).
Tighten the thread and cut it, leaving the tip for sewing. Tie the second ear in the same way.
Torso
Knit with a thread of the main color (beige).
1st row: 6 single crochets (sc) in a magic amigurumi ring.
2nd row: 6 increases (12 sc)
3rd row: 1 increase, 1 sc, repeat 6 times (18)
4th row: 1 increase, 2 sc, repeat 6 times (24)
Row 5: 1 increase, 3 sc, repeat 6 times (30)
Row 6: 1 increase, 4 sc, repeat 6 times (36)
Row 7: 1 increase, 5 sc, repeat 6 times (42)
Row 8: 1 increase, 6 sc, repeat 6 times (48)
Row 9: 1 increase, 7 sc, repeat 6 times (54)
Row 10: 1 increase, 8 sc, repeat 6 times (60)
Row 11: 1 increase, 9 sc, repeat 6 times (66)
12 - 14 row: sc (66)
Row 15: 31 sc, decrease, repeat 2 times (64)
Row 16: sc (64)
Row 17: 14 sc, decrease, repeat 4 times (60)
Row 18: sc (60)
Row 19: 13 sc, decrease, repeat 4 times (56)
Row 20: sc (56)
Row 21: 12 sc, decrease, repeat 4 times (52)
Row 22: sc (52)
Row 23: 11 sc, decrease, repeat 4 times (48)
Row 24: sc (48)
Row 25: 10 sc, decrease, repeat 4 times (44)
Row 26: sc (44)
Row 27: 9 sc, decrease, repeat 4 times (40)
Row 28: sc (40)
Row 29: 18 sc, decrease, repeat 2 times (38)
Row 30: sc (38)
Row 31: 17 sc, decrease, repeat 2 times (36)
Row 32: sc (36)
Row 33: 16 sc, decrease, repeat 2 times (34)
Row 34: sc (34)
Row 35: 15 sc, decrease, repeat 2 times (32)
Row 36: sc (32)
Row 37: 14 sc, decrease, repeat 2 times (30)
Row 38: sc (30)
Row 39: 13 sc, decrease, repeat 2 times (28)
Row 40: 12 sc, decrease, repeat 2 times (26)
Row 41: 11 sc, decrease, repeat 2 times (24)
42 row: 12 decreases (12)
43 row: 6 decreases (6)
Tighten the thread and cut it, leaving the end for sewing. Stuff the body with filler.
Front legs
Knit with a thread of the main color (beige).
1st row: 6 single crochets (sc) in a magic amigurumi ring.
2nd row: 6 increases (12 sc)
3rd row: 1 increase, 1 sc, repeat 6 times (18)
4th row: 1 increase, 2 sc, repeat 6 times (24)
Row 5: 1 increase, 3 sc, repeat 6 times (30)
Row 6: 1 increase, 4 sc, repeat 6 times (36)
Row 7: increase, 17 sc, repeat 2 times (38)
Row 8: increase, 18 sc, repeat 2 times (40)
Row 9: increase, 19 sc, repeat 2 times (42)
Row 10: increase, 13 sc, repeat 3 times (45)
Row 11: increase, 14 sc, repeat 3 times (48)
12 - 14 row: sc (48)
Row 15: 10 sc, decrease, repeat 4 times (44)
Row 16: sc (44)
Row 17: 9 sc, decrease, repeat 4 times (40)
Row 18: sc (40)
Row 19: 8 sc, decrease, repeat 4 times (36)
Row 20: sc (36)
Row 21: 2 sc, decrease, repeat 9 times (27)
22 - 41 row: sc (27)
Row 42: 7 sc, decrease, repeat 3 times (24)
Row 43: 2 sc, decrease, repeat 6 times (18)
Row 44: 1 sc, decrease, repeat 6 times (12)
Tighten the thread and cut it, leaving the tip for sewing.
Tie the second paw in the same way. Fill the paws with filler.
Hind legs
Knit with a thread of the main color (beige).
1st row: 6 single crochets (sc) in a magic amigurumi ring.
2nd row: 6 increases (12 sc)
3rd row: 1 increase, 1 sc, repeat 6 times (18)
4th row: 1 increase, 2 sc, repeat 6 times (24)
Row 5: 1 increase, 3 sc, repeat 6 times (30)
Row 6: 1 increase, 4 sc, repeat 6 times (36)
Row 7: 1 increase, 5 sc, repeat 6 times (42)
Row 8: 1 increase, 6 sc, repeat 6 times (48)
Row 9: 1 increase, 7 sc, repeat 6 times (54)
Row 10: 1 increase, 8 sc, repeat 6 times (60)
Row 11: sc (60), knit behind the back wall of the loop to form a scar transition from the “sole” to the top of the foot.
Rows 12 - 14: sc (60), knit as usual - on both sides of the loop.
15th row: 18 sbn, decrease, 20 sbn, decrease, 18 sbn (58)
16th row: 17 sbn, decrease, 20 sbn, decrease, 17 sbn (56)
17th row: 16 sbn, decrease, 20 sbn, decrease, 16 sbn (54)
18th row: 15 sbn, decrease, 20 sbn, decrease, 15 sbn (52)
Row 19: 14 sbn, decrease, 20 sbn, decrease, 14 sbn (50)
20 row: 13 sbn, decrease, 8 sbn, 2 decreases, 8 sbn, decrease, 13 sbn (46)
21st row: 12 sbn, decrease, 7 sbn, 2 decreases, 7 sbn, decrease, 12 sbn (42)
Row 22: 12 sbn, *decrease, 1 sbn* repeat ** 6 times, 12 sbn (36)
Row 23: decrease, 4 sc, repeat 6 times (30)
24 - 43: sc (30)
Row 44: decrease, 3 sc, repeat 6 times (24)
Row 45: decrease, 2 sc, repeat 6 times (18)
Row 46: decrease, 1 sc, repeat 6 times (12)
Tighten the thread and cut, leaving the end for sewing. Tie the second paw in the same way. Fill the paws with filler.
Tail
Knit with blue thread (or other color of your choice).
1st row: 6 sc in amigurumi ring
2nd row: increase, 2 sc, repeat 2 times (8)
3rd row: sc (8)
4th row: increase, 3 sc, repeat 2 times (10)
Row 5: sc (10)
Row 6: increase, 4 sc, repeat 2 times (12)
Row 7: sc (12)
Row 8: increase, 5 sc, repeat 2 times (14)
Row 9: sc (14)
Row 10: increase, 6 sc, repeat 2 times (16)
11 - 15 row: sc (16)
Tighten the thread and cut, leaving the end for sewing. Stuff your ponytail.
Collar
Use a blue thread to cast on a chain of 30 chain stitches. Double crochet all stitches.
Assembly:
Sew the head to the body, wrap the collar around the neck and sew up the seam on the collar.
Sew the ears to the head, paws and tail to the body. Embroider “toes” on the paws with blue thread and sew felt circles - pads on the hind paws.
Perhaps not a single purchased thing, no matter how much it costs, can be better than something made with your own hands. This is not surprising, because every master puts his soul into his craft, as if he brings it to life.
At the preliminary stage you should prepare:
buy a 2.5 cm hook;
choose what color thread the dog will be knitted from.
By the way, it is worth mentioning the thickness of the knitting threads. Choose ones that are usually used to knit lace. They will not become shaggy, and knitting such a thing with them is much more convenient.
So, let's get to the main point. Do you really want to, but don’t know how to crochet a dog? A master class with a detailed description of the technology will help you.

Technology
Now let's take a step-by-step look at how to make a crocheted dog.
Amigurumi is a special art of knitting small and sometimes tiny products. It originated in Japan and has found recognition among needlewomen around the world.
Amigurumi can be knitted either by knitting or crocheting. It all depends on personal preference. But the size of the knitting needles and hook should be deliberately chosen smaller than for regular knitting. And all because the product knitted using this technique should be quite dense, without gaps or holes.
The article uses generally accepted notations:
sc - single crochet;
VP - air loop;
x() - repeat the action as many times as indicated in brackets;
* — repeat the previous action.
Each detail (tail, paws, body, head, ears) will be considered separately. This is necessary so that even novice needlewomen can understand how a crocheted dog is made. The description of the knitting technology will be detailed and clear. And you will definitely succeed!
How are the legs knitted?
The knitting technology for all amigurumi toys is very similar. Having figured it out using the example of a dog, you can easily knit any other animal.
Start knitting the dog from the legs. They, unlike the head, are not very visible, and if at first something doesn’t work out, it won’t be noticeable.
So, crocheted dog legs do not have a pattern as such. But there is a small step-by-step instruction. By following the tips, you will learn how to crochet a dog.
Leg knitting technique:
Cast on 6 loops and connect the last one to the first. Now just knit in the round until the end of the entire piece.
In the second row, knit 2 sc from each bottom loop, pulling out two new loops in turn. When the row is completed you have 12 stitches.
In the third row, from each loop of the previous row, knit 1 sc and add 1 ch. Such manipulations are repeated until the end of the row. When finished you will have 18 stitches.
18 rows, 1 sc in each loop of the bottom row.
When finished, secure the thread and cut it.
The second leg is knitted according to the same principle. Just don’t cut the thread at the end, but tie 5 ch from it and connect it to the second leg.
How does the body fit?
Using the legs as an example, you can see that amigurumi technology is quite simple. And even novice needlewomen will be able to repeat it. With a little effort they will end up with an adorable crocheted dog.
Amigurumi toys are loved not only by handicraft mothers, but also by their children, for whom they are mainly crocheted. After all, cats, bears and dogs are original and unique, and no one else will have the same one. Besides, my mother made them, that’s the main reason why they are the best and most expensive.
Body knitting technique:
Continue knitting along the connected legs.
Also knit in the round, only now in a larger circle. 18 sbn on the first leg + 5 sbn on the dialed chain + 18 sbn on the second leg + 5 sbn. The circle is closed. There are 46 stitches in a row.
4 rows with 1 single crochet in each stitch of the bottom row.
9 single crochets, and then knit the next two loops as one. Repeat 4 times and at the end (knit 2 sc)*.
42 single crochets;
(8 sc, 9-10 together) x 4, *.
38 single crochets.
(4 single crochets 5-6 together) x 6, *.
(3 and 4-5 together) x 6, *.
(2 and 3-4 together) x 6, *.
(8 and, 9-10 together) x 2.
Fasten the thread and cut it.

How are the paws knitted?
How to crochet a dog? This question worries all novice needlewomen. And the purpose of this master class is to tell,
For beginners, a detailed step-by-step description is presented that will allow you not only to knit a dog, but also to understand the technology of knitting amigurumi toys.

Paw knitting technique:
6 loops in a ring.
(1 single crochet + 1 ch) x 6 = 12 loops.
2 rows of 12 single crochets.
(4 and 5-6 together) x 2.
10 single crochets.
(3 and 4-5 together) x 2
8 single crochets.
(2 and 3-4 together)x2.
6 single crochets.
Also knit the second leg.
How are the ears knitted?
How cute they are - dogs, toys in this technology are presented in a whole range on the Internet. However, it is quite difficult to find the most understandable and detailed among them.

This article, which describes in great detail how to crochet a dog, is a master class accessible even to novice needlewomen.
Ear knitting technique:
6 loops in a ring.
(1+1ch) x 6 = 18 loops.
(2+1 ch) x 6 = 24 loops.
14 rows of 24 single crochets.
Cut a long thread (to connect all parts of the product) and pull out a loop.
Also knit the second eye.
How to knit a head?
It's not that difficult to crochet a dog. The product design is quite simple and easy to implement. Having understood it, you can say that you will master the amigurumi technique. And then all that remains is to polish your skills. But the game is worth the candle!
After all, having easily figured out how to crochet a dog, you can knit any toy you like.
Head knitting technique:
6 loops in a ring.
(1 single crochet + 1 ch) x 6 = 12 loops.
(1+1 ch) x 6 = 18 loops.
(2+1 ch) x 6 = 24 loops.
(3 + 1 ch) x = 30 loops.
(4 + 1 ch) x 6 = 36 loops.
(5+1 ch) x 6 = 42 loops.
(6 + 1 ch) x 6 = 48 loops.
7 rows of 48 single crochets.
(6 and 7-8 together) x 6.
(5 and 6-7 together) x 6.
(4 and 5-6 together) x 6.
(3 and 4-5 together) x 6.
(2 and 3-4 together) x 6.
Cut a long thread (to connect all parts of the product) and pull out a loop.

How to knit a muzzle overlay?
To make the dog look as much like a real one as possible, you should separately knit a special overlay for the muzzle, which will have a nose and mouth.
Technique for knitting a muzzle:
6 loops in a ring.
(1 single crochet + 1 ch) x 6 = 12 loops.
(1+1 ch) x 6 = 18 loops.
(2+1 ch) x 6 = 24 loops.
3 rows of 24 single crochets.
Cut a long thread (to connect all parts of the product) and pull out a loop.
How to tie a ponytail?
Every dog has a tail. And knitted one is also necessary.
Ponytail knitting technique:
6 loops in a ring.
(2 single crochets + 1 ch) x 3 = 9 loops.
7 rows 9 single crochets.
Cut a long thread (to connect all parts of the product) and pull out a loop.
Assembling the dog
That's practically all. The toy parts are ready, now they need to be connected. To do this, use a hook or, if you prefer, a needle.
It’s better to start with the muzzle, as this is the most difficult moment in creating your dog. Sew the ears onto the top of the head. Then fill the head with filler (for example, cotton wool), and carefully connect it to the muzzle cover. Embroider the mouth and nose. And then sew on the button eyes.

The next step will be the body. Sew a tail to it, which must first be filled with cotton wool or any other filler. Then stuff the body and connect it with the paws of the dogs, which should also be stuffed first.
Crocheted and ready! You can give it to your child for joy.
As you can see, it is not so difficult to crochet a dog. The knitting pattern of the parts and their subsequent assembly are very simple. And to perform the toy itself you will need:
your imagination, desire and a little diligence.
All this is quite accessible. In addition, the result will please both you and your children. And also an unusual (or any other animal), the master class of which you have just studied and brought to life, will be an excellent gift for your loved ones or friends! Both small and older people.

The technology for knitting amigurumi toys (namely, the dog described above belongs to this type of needlework) is always the same. If you are now holding a knitted dog in your hands, then you have mastered the amigurumi technique. And now it won’t be the slightest difficulty for you to knit, for example, a bear, a cat, a bunny or any other animal!
Success in creative work!
Knitted crafts can be not only cute and beautiful toys for children, but also excellent souvenirs or gifts that will decorate and, perhaps, complement the interior of your home. If you're just starting out with crafting, try crocheting small amigurumi-style dogs and you'll soon be wanting to fill your space with lots of these adorable stuffed animals that are easy enough to make yourself.


Amigurumi - knitting for everyone
This beautiful and interesting word is the name of one of the techniques in the Japanese art of knitting small animals - needlewomen knit bunnies, cats, dogs, bears, monkeys, owls, sheep and many other little animals. Initially, such knitting was done both on knitting needles and in crochet, but recently crafts made with crochet have become increasingly popular.
As a rule, in order to do this, you take regular colored yarn and use a very simple knitting method - in a spiral. An amigurumi dog, like any other knitted toy in this style, begins with knitting the so-called amigurumi ring. If you look at the diagrams, you will see that it is usually indicated there in the first row.
However, if you wish, you can start in a different way: just pick up two air loops and knit the number of single crochets that you need into the second loop from the hook. However, keep in mind that the amigurumi ring has a very big advantage, since with this method of knitting you will not have a hole in the middle.
In Japanese technology, unlike European technology, there is, as a rule, no need to connect circles. It is better to knit with a crochet that is a couple of sizes smaller relative to the thickness of the selected yarn. This way you will be able to create a dense fabric in which there will be no openings or gaps, and this will help preserve the stuffing material and give the toy a more aesthetic appearance.
The amigurumi dog is made in parts, which are then connected. Sometimes, to give life weight to the limbs, plastic pieces are used to stuff them, and the body itself is stuffed with fiber filler.


Before you start working directly, prepare everything you need:
- yarn of the desired colors (as a rule, you will need several);
- hook relative to the thickness of the yarn;
- filler (you can use cotton wool or padding polyester);
- scissors, glue;
- a special needle for sewing soft toys or a needle with a large eye;
- blanks for the nose and eye (these can be beads), other decorations, if you like.
Decide on the expected appearance of your future toy. An amigurumi puppy can be any breed: dachshund, bulldog, poodle, dalmatian, papillon, shiba, shiba inu or any other. Depending on what you choose, you will need to select the colors of the yarn.
And here are some examples for inspiration. Let's start with the dachshund.
- The dachshund amigurumi will look very beautiful if you use threads of bright rainbow colors to create it. You will also need a thin hook (No. 1.5).
- First make the body of the dachshund. You need to start and end with one color (let it be brown), and in the middle place stripes of all the colors of the rainbow. Having tied the body, fill it with filler.
- Then grab your head. You need to start knitting it from the spout, that is, with black yarn. Then also stuff and tie.
- Now it’s the turn of the neck and ears. And after that - the tail and paws.
- When everything is ready, sew all the parts together, glue on the eyes (or sew on beads). You can also make a small beautiful collar for your dachshund. To do this, you need to knit twenty chain stitches, connect them into a ring and knit twenty single crochets. Then cut the thread, choose some other color and use a thread of this color in the first row of the chain that you already have, knit another twenty sc on the reverse side. To finish the collar, take a bead, thread it through the thread and secure.
- Your rainbow and cheerful dachshund is ready!

Using the same principle, you can knit any other dog. If you are not too confident in your abilities, you can use diagrams that clearly show the order of work.


Having chosen the desired scheme, focus on it. First, tie the head and mark with dots the places where you will later glue or sew the eyes. Having finished the head with the nose, move on to the ears and front legs, then the body, hind legs and tail. Having knitted all the parts, stuff them with filler and sew them together.
Finally, you can decorate your dogs with some interesting details or accessories, giving them a special personality, charm and character.
Knitting is coming back into fashion, and this is not surprising: isn’t it wonderful when skilled craftswomen, with a skein of thread and a hook, create simply amazing masterpieces? Take, for example, dog toys, the diagrams and descriptions of which you will find in the article.
soft friend
A homemade toy always has many advantages, ranging from personal preferences to the quality of the products included in the composition. This is an excellent solution for allergy sufferers who are highly sensitive to a variety of synthetic odors. In addition, such homemade animals are several times cheaper than purchased options.
So, today our hero will be a knitted one, which we will analyze in detail. We will pay great attention to all the details, difficulties and features of the work so that this lesson is clear even for beginners.
For worry-free work

To begin the knitting process, you need to prepare the necessary materials. Since this is, first of all, a crocheted dog, the diagram and description of which will be discussed later, special attention should be paid to the filler.
Currently, there is a choice on the market, and the variety is so great that you instantly get lost in the desired idea. Therefore, you need to determine in advance what qualities crocheted dogs should have with diagrams and descriptions.
For example, if you want a product to have relaxing effects, then polystyrene balls would be an ideal option. In another case, synthetic fluff, holofiber and synthetic padding will add softness and lightness. And if you are trying to create an organically clean toy, then sawdust and shavings will help you perfectly in this matter.
Warm threads
You can also talk about yarn for a very long time. With all its diversity, first of all, base it on your preferences. So, if you do not want your knitted product to be covered with pills, fluffy and electrified, then yarn with a high content of synthetic fibers is perfect for you. And vice versa, if you need a crocheted dog, the pattern and description of which we will describe a little later, to have air fluff, then choose mohair or threads with a large percentage of natural wool.
In addition, before the process of making a toy, you should not run to the store for new skeins of yarn. Due to the fact that the product is knitted using a special technique, we will need a small amount of thread, trimmings and remnants of which you will definitely find at home.
What is amigurumi

You should not be afraid of such a name when you hear it for the first time, since the difficulty of pronunciation and memorization of the word is not at all justified in practice. So, amigurumi is the Japanese art of crocheting various toys. These can be almost invisible animals, as well as large-scale pillows, hats and other elements containing many details.
Since this is an eastern current, it is accompanied by very cute faces, colors and shapes of toys. In addition, the silhouette of amigurumi is its main feature, thanks to which it is so recognizable throughout the world. Rounded shapes, slightly bulky heads, a huge number of tiny details: all this emphasizes the individuality of this knitting style. These will be our knitted dogs, the description of which we will consider in detail right now.
A little more necessary

When listing, we did not name all the necessary components that the toy will consist of. You can find all additional materials in stores for creativity, handicrafts or sewing.
- Hook. In this case, we cannot say for sure which exact hook size will suit you. Therefore, the choice is yours, since it directly depends on the thickness of the yarn. In addition, when buying a tool, pay attention to the handle and its connection with the metal part, because this is the main point of failure, even for a new thing.
- Beads or ready-made eyes to create a muzzle.
- Floss threads. They will also help us add individual features to the toy's face.
Special signs
Also, while making a crocheted dog (with diagrams and descriptions), we will introduce you to special abbreviations that are often used in knitting circles. We will also use them in our work, but for faster understanding and memorization, their transcript will also be nearby.
- KA - amigurumi ring. It is a kind of basis for any toy and is done in just a couple of seconds.
- RLS - single crochet. This is the second most used “pattern” in the amigurumi technique, since it is very small and neat, and the canvas of the finished product looks very solid.
- UB is the usual process of decreasing stitches.
- PR is the reverse process of adding loops.
- VP - air loop - the basis of any crochet product.
Crochet dogs: patterns and description of the process

It's time to start making the toy. To make everything clear and avoid any questions, we will describe all the steps step by step in as much detail as possible. This will not only simplify the process of perceiving information, but also speed up the work process.
- First, let's tie the upper legs: to do this, use threads of the color of the future toy dog to make an amigurumi ring (KA) and knit 6 single crochets into it (SC). Tighten the ring a little to give it a neat shape. Now in the new row in each single crochet (SC) we make two of the same loops: in total there will be 12 finished loops in the row.
- Now we increase every second single crochet (SC) to get 18 loops in the row. In this way, we gradually increase the handle, then knitting two stitches (RS) in every third element. If you count, you should end up with 24 loops.
- Now we change the color of the thread, as the sleeve of the blouse begins. You choose its color yourself, and we’ll take light green. We knit the first row with a thread of a new color, and then make a decrease (UB). To do this, you need to knit every 3 and 4 loops together. As a result, you will be left with 18 single crochets (SC).
- Now from the seventh to twenty-fourth rows we simply knit all single crochets (RS). As a result, we get a long green “pipe”. When all the rows are ready, we stuff the foot, leaving a little empty space, fold the pipe hole in half and carefully knit the loops together, getting the finished part. We also make the second foot.
- We move on to making the hind legs: we knit a heel from dark yarn, casting on a chain of 10 air loops (VP). Now, starting from the second loop, we knit 8 single crochets (SC), in the 9th loop we make an increase (PR) of five stitches and again 8 single crochets (SC). We make the 1st stitch (RS) in the new row, in the 2nd we make an increase (PR), knit 6 more loops, in the next two columns we make the 1st increase (PR), and then we create 2 more single crochets ( SBZ).
- We knit the next half in a mirror order, as we knitted the first part, getting 28 loops at the end of the row. In the new row we make 10 single crochets (SC), in the next 9 loops we make 1 increase each, and then again 10 loops. In total, you get 38 columns that complete the heel.
- Now we take a thread the color of our dog’s fur with a crochet stitch, the diagrams and descriptions of which we are gradually becoming familiar with, and knit all 38 stitches. In the new row we knit 10 loops, and the next 12 we make decreases (UB), completing the row again with 10 stitches. Then we knit 12 loops, 5 decrease stitches and again 12 loops. We start the row with 8 single crochets, make 6 decrease stitches, turning them into 3 stitches, and completing the row with 9 stitches. There are 23 columns in total.

Change the thread to a dark color representing the pants, knit the first 23 single crochets (SC). We knit in this way from the 10th to the 23rd rows. We cut the thread of the first leg, carefully tucking it into the fabric, and leave the thread of the second leg untouched. Don't forget to add filler.
Soft tummy
Now that the legs and arms are ready, let's start making the body. It was not in vain that we left the thread on one of the lower legs, since it is from it that we will continue to knit the body of the toy.
- In the 23rd row we knit all the loops along the leg, then we cast on 10 chain loops and again 23 stitches near the second leg. We knit the resulting 56 loops over the next 3 rows. And in the 4th row we decrease, getting 50 single crochets. This way we knit 4 rows.
- In the 5th row, we reduce the total number of loops by 7 parts, change the thread to the green color of the sweater and knit 43 loops for 3 rows. Again we decrease by 6 loops, but we already make 11 rows of 36 stitches, again we decrease by 6 loops and knit 2 rows. In the next row we decrease by another 6 loops, make one row and leave the thread for further fastening.
- We knit the head according to the pattern below, cast on 60 stitches, make 9 rows, and then go to decrease, filling it in advance with padding polyester.
Mustache, lips and tail
We knit the ears and muzzle according to the same pattern, but in different colors, making an amigurumi ring, stitching stitches into it and knitting rows. In the end, we should get a “cup” from which we will make ears, fold them in half, knit the muzzle, and fill the blank with padding polyester.

Now you can put everything together: sew the ears, muzzle, eyes to the head, outline the nose and mouth, sew the head and limbs to the body.
As a decoration, we will tie a long scarf and straps onto the pants, which we will fasten with buttons. You can add a dark spot to the head, like real dogs, a forelock of protruding hair. Now that we can handle crocheted dogs with descriptions and patterns, you can safely delight yourself and your loved ones with homemade toys!
A small crocheted dog can replace a purchased toy, because... it contains the warmth of hands, the soul of the craftswoman is invested. This topic is very relevant now, because... According to the Chinese horoscope, the Yellow Earth Dog is the symbol of 2018.
For the New Year, you can crochet an amigurumi dog keychain, an oven mitt, a dog for a bottle of champagne and many other souvenirs. Therefore, we present to you a selection where you can see a master class on knitting small dogs with a detailed description and diagrams. There is also a video tutorial from the YouTube channel on how to crochet a Chihuahua dog, and other lessons on crocheting dogs for beginners.
Dog keychain
Such a cute symbol of the year in the form of an amigurumi dog will be a wonderful gift. Even those who are just starting to crochet can make amigurumi toys. A dog symbolizes devotion, so this keychain will be a very symbolic gift for a loved one. To help you get the job done faster, we offer a detailed description of the entire crocheting process.
For work you will need
- cotton;
- brown acrylic yarn;
- hook;
- light felt;
- floss;
- filler;
- 2 beads;
- carabiner with cord.

Progress
We knit toys in a spiral without a lifting loop.
At the beginning of each row we knit a marker (thread of a contrasting color). This will make it easier to determine the beginning and end of the row.
Head. We start knitting with brown threads from a set of braids of 10 air loops (ch).
- From the second loop from the beginning of work we knit 8 single crochets (sc or dc), in the last we make 3 sc. On the second side of the braid we knit 7 sc, make an increase (inc), i.e. We knit 2 in 1 loop. It turns out to be an oval part, then we continue to work in a spiral.
- Increase, 7 sc, 3 increases, 10 sc, 2 inc. There are 26 loops in total.
- We knit the next row the same way, only instead of 7 sc we knit 10 (32 stitches).
- From rows 4 to 9 we knit 32 stitches. If you want to get a slanted muzzle, then add offset loops in the necessary places.

- 3 sc, 10 sc for purl half loops, 19 sc.
- We decrease loops (dec) 2 times, i.e. we connect 2 loops with one, 14 sc.
- 22 sc, 4 sc (knit the stitches together with the loops of the nose, put the nose inside the head with the wrong side away from you), 4 tbsp.
- 22 tbsp., turn the nose outward, pass 2 tbsp., 4 sc. The result is 30 loops.
- We go through the next two circles at 30 st.
- We make 6 segments 3 sc, dec.
- The next 4 rows we go through 24 stitches, we make shifting loops to align the part, focusing on the first row.
Ears. Let's start knitting the ears without tearing off the thread.
- 9 ch, in the third cell from the hook we make an inc - in 1 st - 3 double crochets (dc), 2 dc, 2 half double crochets (hdc), 2 sc. We tie the opposite side of the braid with 2 sc, 2 hdc, 4 dc, inc - in 1 st - 4 dc.
- We run 12 tbsp over the head. and we knit the other ear in the same way. We knit 12 tbsp around the head again.
- Now we loosely fill the head with filler, connect the two sides of the part, and fasten everything together with 12 posts.
- Don't forget to sew on the nose, filling it lightly with padding polyester.

Nose. We knit with black cotton yarn.
- We form two chs, make 6 stitches through the first loop.
- We pass 1 sc three times, in 1 p. knit 3 sc.
- We knit the next circle 12 stitches, adding 1 offset stitch to each stitch to make the nose triangular.
- Cut the thread, leaving a little for stitching.
A spot on the face. The part is knitted with a light thread, starting with two chs, into which 6 tbsp are knitted. In the next round, 6 increments are made, resulting in 12 stitches. In the next three rounds, we increase, first after 1 stitch, after 2 stitches. and after 3 tbsp. When we have 30 loops in a row, fasten the thread.
Torso. We begin to knit this part from the back of the head, knitting 10 sts along the front half-loops of the tenth row of the head.
- Along the half loops of the resulting row, we continue to work in a spiral: we do 8 stitches twice, increase. We get 20 p.
- We pass laps 3-6 without changes.
- Then we make 4 additions, 4 tbsp.

- 2 inc, 9 sc, 3 inc, 9 sc, inc.
- Twice – 1 sbn, increase, 9 st., three times – 1 sbn, increase, 9 sbn, twice – 1 sbn, inc).
- 11-15 circles 36 sc + shifting loops.
- 7 tbsp., skip 22 stitches, 7 tbsp. Set up a marker.
Paws.
- Twice 5 tbsp, decrease.
- Double 4 sc, decrease 10 loops.
- Twice 3 sc, dec – 8 p. Fasten the thread.
- We skip 4 loops, go through 14 stitches, and continue to make another paw in the same way as the first.
Assembling the toy. We fill the body loosely with soft filling, sewing the hole at the bottom with matching thread. In place of the ponytail, we put on a braid of 11 sts, knit 3 dc, 3 hdc and 3 sc from the 3rd st from the hook. We fasten the thread and hide the tails.
We sew a spot onto the head, sew bead eyes onto felt circles, and glue (sew) two parts onto the muzzle. 
Using floss we embroider a highlight on the nose and eyebrows. We make a drawstring on the muzzle from black threads, and attach a carabiner with a cord between the ears.
We knit a collar from air loops, fasten it and we’re done.
Using this scheme, you can make amigura dogs of all breeds, for example dachshund or pug.

Crochet dog potholder
Now let’s look at the intricacies of knitting a potholder in the shape of a dog, the symbol of 2018.
In this case, we also do crocheting in a circle, only our circle will be flat.
Because the product does not require stuffing, it can be knitted with double crochets (then the work will go faster). But if you want to get a dense product, you can knit it with single crochets.
The toy consists of a large circle head, a muzzle with a nose, eyes and ears.
- First we make a circle of the desired diameter. We start working with an air loop, in which we make 6 tbsp. We knit all subsequent rows with the same columns, only adding 6 pieces evenly.
- Small black circles will make eyes. Using white thread we embroider small pupils on them.
- Separately we knit a triangular nose, muzzle, and two ears. We sew all the details together, embroider mustaches and a smile on the face.
- We tie the potholder along the edge with a “crawfish step”, making a loop of air braid in the center.

Multiple knitting patterns for a small dog, the symbol of 2018, can be found on the Internet or on the YouTube channel.
Crocheting a dog symbol of 2018 (video below) is a very exciting activity. And rest assured that everyone will be delighted with such cute New Year's gifts.