Helpful Hints
If you are planning a wedding celebration, you are well aware that the cost of it is likely to far exceed those planned: you will definitely need small details, which a great many are required for a wedding.
TAKE A FUN TEST:
If the budget is limited, and you dream of a wonderful, beautiful wedding with all the attributes, why not use some imagination, find time and make some original decorations with your own hands?
DIY wedding invitations
Starting to prepare for the wedding, you will certainly think about how beautifully warn your loved ones, friends and acquaintances about it. Wedding invitations can be ordered, but making them yourself is not so difficult. In addition, guests will certainly appreciate your work and, most likely, keep postcards in memory of your solemn event.

What you may need:
Sheets of white or colored paper and cardboard
Lace
Satin ribbons - wide and narrow
Curly and regular scissors
Text printer
Hole puncher
Lighter

Let's get to work:
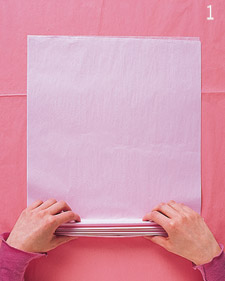
1) First, consider what size will your invitations be, and type the appropriate prompt text. From one sheet of A4, as a standard, two invitations can be obtained, and from one sheet of cardboard - 1 envelope.
Colors can be taken in a variety of ways. Traditionally, white or delicate pastel colors are used, but if you want to make your invitation bright, colorful, you can take bright colors of cardboard and ribbons.
2) Print the text of the invitation on a piece of paper, and then cut it out using curly scissors.

3) Using a hole punch, make a hole at the top for attaching a bow.

4) Make an envelope out of thicker paper. To do this, according to the measured templates, cut out a similar figure from sheet A4, taking into account the fact that the side edges of one of the sides will be protrude a little and they should be bent. The envelope should be made depending on the size of the invitation itself, so that it can fit perfectly inside the envelope.

5) Use lace ribbons to decorate the blanks for the envelopes. To do this, use glue to fix the lace on the inside of future envelopes.

6) After that, fold the edges along the folds and glue them to the opposite side to make an envelope.

7) Make a hole in the upper part, insert the invitation into the envelope and secure it in it with a thin ribbon, threading it through the holes and tying it with a bow.

8) Make with wide and narrow satin ribbons large bow for the center of the envelope. To do this, bend two pieces of wide tape and secure the center with a thin tape. Do not forget finish the edges satin ribbons with a lighter.


9) Glue the resulting bows to the center of the postcard with glue. The work is ready.

Original wedding invitations
very nice invitation with an unusual heart in the middle easy to make using the following materials and tools:
Colored paper, preferably tissue paper, very thin - several colors of different shades of red
A blank for a postcard with inscriptions, inside you can write details of where the wedding will take place and so on.
Sheet of plain paper
Scissors

Fold each of the sheets with an accordion (5-6 folds) wide 2 centimeters. Then make cuts with scissors.

Glue the strips with cuts of different colors between each other, and then glue on the back heart cut out of plain paper.

Cut off the excess tissue paper along the outline of the heart. Then glue on the blank for the postcard two ribbons, cut out of paper, as shown in the photo. On these ribbons, you can write something like: "We invite you to the celebration" and date. After that, stick a multi-colored heart on top.

Decorating wedding cars with your own hands
Decorations for the wedding carriage- an important detail of wedding events, because the car should be as elegant as everyone else. Traditionally, cars are decorated flower bouquets, colorful ribbons and bows, toys.

The most popular detail for decorating wedding cars are long colorful ribbons. Including you can find special metal ribbons that sparkle in the sun.
It is not so difficult to fix the tapes on the car, you need to hook them on the ledges in the front and in the back, or, in order not to cover the windshield - front and side.

Here is another example of a simple car ribbon decoration:

With the help of the same adhesive tape and decorative New Year's rain or braid you can make whole drawings: waves, flowers, hearts. Here it is important to fasten the braid to the surface with adhesive tape in the right places, and it will beautifully fall down under its weight, giving the impression of an original pattern.

Flowers- the second most popular detail for decorating wedding cars. And it is not necessary to make large bouquets in front and behind, you can just fasten one flower over the entire area of \u200b\u200bthe car. This photo shows that the flowers are attached with a simple adhesive tape (both real and artificial flowers will do. From afar, adhesive tape will not be visible):

Bouquets of flowers, balls or the same folded ribbons will look good on the handles.

Can be original inside of the machine, for example, wrap colorful ribbons around the steering wheel or hang garlands on the windshield. Remember to keep these decorations did not interfere with good visibility for the driver.

Those who have artistic ability can paint the surface of the car with beautiful drawings using a special washable paint. Such a decoration, of course, is not for rainy weather, but it looks very impressive. If there are no artistic abilities, then ready-made stencils can be used, or stickers for cars which can then be easily removed.

Making wedding cars with your own hands (video):
Decoration of wedding glasses
Decorating wedding glasses for a celebration is not at all difficult. For this you will need:
Satin ribbon or braid
Lace, lace ribbons
beads
Small real or artificial flowers
Paint for painting glass
The easiest way to decorate glasses is use of satin ribbons. Usually wedding colors are white and soft pink, but you can use other colors if you wish:

To make this decoration, you need fold ribbons of three colors in a row, and then wrap them around a simple smooth glass, cutting off the edges in the right place and strengthening the decoration on the product with glue. To prevent the tapes from slipping, try to wrap them as tight as possible. Ahead, glue the prepared bow from one of the ribbons.

Another easy way to decorate a glass with ribbons is wrap the leg, and in the place where the leg is attached to the bowl - tie a bow. In this case, you can do without glue.

You can also use more thin satin ribbons, which in the form of patterns are glued directly to the glass. Ribbons can be chosen pure white or multi-colored. In this case, the cut ribbons were carefully glued to the glass in the form of three pyramidal patterns and decorated with beads. At the base of the bowl bows tied from a combination of thick and thin strips.

Advice: It is very important when working with satin ribbons to process their ends with the help of fire, otherwise they will crumble and lose their neat appearance.
DIY wedding glasses with lace
Another very simple way to decorate glasses is use of lace. Lace is an ideal finished material that already contains an intricate pattern and looks great on glass. Ideal for wedding glasses white wide lace.

To make lace richer, you can add beads, satin ribbons and other decorations. In this case, the glasses were decorated with rhinestones.

Advice: To better attach the beads to the uneven surface of the glass, it is better to use flat beads or rhinestones.
Painting wedding glasses
Those who are good with paint brushes can try paint glasses with your own hands. Here fantasy will work to the fullest: you can make beautiful curls, bitmaps, floral images, hearts, bows and so on. The pattern on the glass repeats the pattern of lace. It uses white and gold paint:

For such drawings, it is not necessary to have great artistic abilities, you can also use stencils:

Advice: For painting glasses, you can use glass paint, simple gouache or nail paint.
How to make a rose from ribbon
Wedding glasses are often decorated little roses made from the same narrow satin ribbons. You can buy ready-made roses at the jewelry supply store, but they are easy to make yourself. There are several ways to create a rose from ribbons, we offer you one of the simplest.

To make satin ribbon roses you will need: ribbon, scissors, thread and needle.
Let's get to work:
Take the edge of the tape in your left hand, and with your right hand, begin to fold the tape so that you get the middle of a rose. Then fix the result with a thread and a needle.

Continue to twist the tape not too tightly, remembering to periodically make stitches to secure.


At the end, do not wrap the tape too tight so that you get half-opened bud. Secure the base of the rose with thread. Cut off the excess with scissors.

Advice: In order to easily attach the rosette to the flat surface of the glass, make it as flat as possible.

By the way, a great idea to glue the glass real rose petals, however, such decoration is short-lived and will ideally look "fresh".

In addition to glasses, you can also beautifully decorate a bottle of champagne. You can read more about this.
Wedding hall decoration
Decorations for the wedding hall usually the concern is those who rent this hall, but sometimes it happens that decorations are a separate service. You can try to decorate the hall yourself to your taste. For this you may need balls, flowers, colorful ribbons, tablecloths, draperies.

Decoration of the wedding hall with flowers
Natural flowers always refresh and give the room an elegant and very festive look. The only thing, of course, is that they lose their appearance quite quickly without water, so attaching bouquets of fresh flowers to the walls is not the best idea.
It is possible to use only artificial flowers, which will cost you less and which can be used many times later. for sale ready made artificial flower garlands, and your task is just to hang them in the right places.

If you still choose fresh flowers, it is better to use them to decorate tables or put them somewhere indoors. large vase with water.

Since tables at weddings are usually bursting with dishes, and there is almost not enough space for decorations, you can choose tall narrow vases with flowers.

Decoration of the wedding hall with balloons
Balloons will cost you a little less than flowers, so you can leave the flowers only on the tables, and decorate the hall itself with balloons.
If you don’t know how to weave chic garlands from balls and make unique figures out of them, it doesn’t matter. You can simply combine several multi-colored balls and hang them.

Can be used balloons filled with helium. This gas is lighter than air, so the ball will constantly strive towards the ceiling. In order for it not to fly away, it is enough to attach it to chairs, tables or other interior details.
With such decorations, even a simple interior acquires its zest and get more comfortable.

Balloons filled with helium do not have to be tied to something, just tied to them serpentine and let it go up to the ceiling. Such decoration of the hall will look original if the ceilings in the room are not too high.

DIY balls of thread
If ordinary balloons seem too simple and battered to decorate a wedding hall, you might like balls of thread.
What you may need:
Thick threads for knitting
PVA glue (1.5 cups)
Starch (0.5 cup)
Water (0.25 cup)
Balloons
Oilcloth
Ball hanging bar or other device
Vegetable oil
1) First, inflate the balloons of the desired size and hang them by the threads, after lubricated with vegetable oil so that the threads do not stick to them later.

2) Mix glue, starch and water until smooth.

3) Dipping the rope in a mixture of glue and starch, wind it around the ball. Leave hanging on the bar for a day.

4) After the glue is completely dry, you need to pierce the ball and pull it out through the resulting holes. The rope will continue to hold its shape, and you will end up with a ball like this:

Decoration of the wedding hall with fabric
To make the festive table look even more pompous and solemn, on the sides you can add decorations made of fabric. Usually these are light and airy materials - lace, mesh, tulle, tulle and others, which are fastened with waves, complemented by multi-colored floral decorations.

Think ahead, What colors will your room be?. Pay attention to the color of the walls, floor, ceiling. The most neutral color of jewelry is white, but you can combine a variety of colors with it. For example, the tablecloth itself can be white, and the fabric decorating the tables can be soft pink:

Look nice too large strips of delicate fabric hanging from the ceiling. To do this, you need to carefully study whether it is possible to attach the fabric to the ceiling. If not, then it is better to stop at decorating walls, tables and chairs.

A very original idea to add a bride and groom under the tablecloth and table cloth garlands-light bulbs. These ornaments are usually used as Christmas decorations, but will look incredibly beautiful at a celebratory banquet, making the bridal table stand out from everyone else.

Light bulbs will also look chic on the ceiling and walls.

For small cozy rooms, you can create a romantic atmosphere using subdued light and lots of candles. This is suitable for those who want to have a modest quiet wedding with pleasant calm music, without particularly wild fun and noisy entertainment.

Garland decoration
The easiest way to create homemade garlands - using thread and colored paper. You will also need a sewing machine for this. Such garlands look very stylish, especially in large quantities, despite the simplicity of their material and ease of manufacture.

Cut out circles of different sizes from colored paper.

Then, using a sewing machine, sew the circles of paper so that they connect in one long garland. In this case, a small distance can be left between the circles.

You can make whole compositions from these garlands and decorate the wedding hall with them.

DIY wedding table decorations
In order for guests to quickly and easily find places at the festive banquet, number tables and post a list of guests in front of the entrance to the hall who will sit at a certain table. On the tables, the places can be numbered or the following unusual cards with names can be attached to the glasses:


To do fluffy skirt for the table of the bride and groom you will need:
A large amount of transparent light fabric (tulle, mesh, tulle) or other fabric of your choice
The tape that will hold the tape, (slightly larger than the perimeter of the table).
pins
Scissors

Let's get to work:
Cut the fabric into strips wide 10 centimeters, and in length - in two heights of the legs of the table. Then start tying long strips onto the tape so that they are the same length. As a result, you will get a ribbon tied with strips of fabric, which will be a skirt.

Tie a ribbon skirt around the edges of the table and secure it to the tablecloth with pins.

Wedding decorations for the bride
A very simple, but insanely beautiful wedding decoration for the bride's hairstyle can be made from feathers.

What you may need:
White feathers (thin and large)
Sew a bead or button in the center from the front.

To make it convenient to attach this feather flower to your hair, add to it from the back side hairpin invisible.
Wedding banquet with your own hands. Originally folded napkins add extra charm to the table setting.
Decorating a wedding table is a responsible business. All details must be taken into account. In particular, it is very important to know how to roll napkins according to the rules, so that it is beautiful and spectacular. A napkin is generally a mandatory attribute of a table setting. First of all, you should know that the napkin can be made from colored or white linen. It must certainly be square, regardless of size. And one more detail - the napkin should be starched.
If you decide to cover do-it-yourself wedding banquet, these details should be taken into account and prepare napkins according to all the rules. To tell you how to fold napkins nicely, we made a selection of videos.
Watch and learn. And let yours be the most beautiful, and the wedding will be remembered forever.
Fan in a ring (in a glass)


Wedding parties are attended not only by gentlemen, but also by ladies. It is in this way - in the form of a fan - that you can beautifully fold napkins on the wedding table.

1. Initially, the napkin in the straightened form lies face down.
2. Fold the napkin "accordion" (2a).
3. Bend it in half in the middle.
4. Fill the napkin in the ring (or put it in a glass) and straighten the “fan”.
table fan


1. Initially, the napkin is folded in half with the right side out (fold from above). Collect three quarters of its length into an "accordion", bending the first fold down.
2. Fold the resulting figure in half so that the folds are on the outside on the left side, and not the folded part on the right.
3. Take the napkin in your hand so that the open ends of the folds look up.
4. Fold the unfolded part of the napkin diagonally to make a “stand”, as shown in the photo.
After that, tuck the “stand” between the folds and place the napkin on the table.
Artichoke


1. Lay the napkin wrong side up. Bend all four corners to the center.
2. Bend all corners to the center again.
3. Turn the napkin over.
4. Bend all corners to the center again.
5. Pull out the tip of the napkin that is inside the rectangle.
6. Pull out the rest of the tips.
7. Pull the remaining four corners from under the folded figure
Lily


1. Fold the napkin diagonally.
2. Align the left and right corners with the top of the triangle.
3. Fold the napkin in half along the horizontal axis.
4. Bend the top of the upper triangle.
Column


2. Bend the base up, then back about 2-3 cm.
3. Starting from the left, roll the napkin into a tube. Lay the remaining edge in the lower folded edge of the napkin.
jabot


1. Initially, the napkin is folded in half (fold at the bottom).
2. Fold the napkin in half again (open corners are on the top right).
3. Bend the top of the corners down diagonally and fold it "accordion" in the direction of the diagonal fold.
4. Fold "accordion" in the direction of the fold the next corner at the top right.
5. Bend the bottom corner under the napkin.
The right and left corners are also folded under the napkin.
Envelope for instruments


1. Initially, the napkin lies with the wrong side up. Fold the top left corner towards the center.
2. Fold the napkin in half from left to right.
3. Fold the napkin in half along the horizontal axis. Bend the bottom under the top.
4. Bend the top corner to the center.
5. Bend the side corners back.
Shirt


1. Initially, the napkin is folded diagonally.
2. Fold up a small strip of fabric at the base of the triangle and turn the napkin right side out.
3. Bend the right corner to the left down, the left corner to the right down.
4. Straighten the corners strictly symmetrically and fold the bottom edge back.
5. The “shirt” can be decorated with a bow or candy cut out of fabric (paper).
How to roll a doily
There is such an anecdote: a client in a restaurant asks why the napkins are greasy, and the waiter says, they say, I’m sorry, but you don’t need to wipe yourself with pancakes.
Laughter with laughter, but once thin low-fat pancakes such as pita bread were really used as napkins. For the same purpose, fig leaves, rice paper, sleeves of clothing and even the hair of court boys were used at different times.
The first cloth napkins appeared among the ancient Romans. Large rectangular panels protected the bed from pollution (the patricians ate lying down), they also got their lips and hands wet.
In Russia, the decree of Peter the Great stimulated the use of these hygiene products, since then it was impossible to wipe yourself with a sleeve or a tablecloth. Paper napkins familiar to us were patented in the 19th century, and their in-line production began only in the 70s of the last century.
To date, when serving a banquet table, cloth and paper napkins are used. The former are designed to protect clothes from contamination; wiping greasy hands or lips with them is now not accepted. Although it will be right to blot your lips with a cloth after drinking or touch it with slightly soiled fingers.
In order to create a festive mood and surprise guests, you can wrap and twist the most incredible shapes from square napkins. After washing, the fabric needs to be starched - so it keeps its shape better.
Impressive compositions are built in napkin holders and from ordinary paper products, cutlery is wrapped in them, and in a cafe or restaurant, many young people strive to twist a napkin rose for their lady.
The art of folding original paper figures - origami - was born in Japan. This skill was a sign of good taste and was mandatory for the upper classes. According to one version, origami goes back to the Asian art of draping fabrics for religious rituals.
We are not Japanese aristocrats, but we are able to decorate the table and cheer up loved ones. We present you a variety of ways to fold napkins with your own hands. Step by step instructions are included. A little practice and you can give lessons to others.
Candle
Start with a simple scheme that does not require time and skill. Wrap the napkin with a tube (for convenience, you can wrap it on a pencil, then remove it) and put it in a glass or glass. Appropriate decoration of a home evening, New Year's holiday, dinner with a loved one. Fast, easy and sophisticated, and guests don't have to guess how to unwrap. By the way, if you arrange a master class for children, then they will gladly take over this function.
herringbone

A coniferous tree is a companion of the New Year and Christmas. Christmas trees from napkins will look beautiful on the table, it’s easy to make them. This option is also suitable for a children's birthday celebrated in winter. Arrange the Christmas trees on plates, and on top for decoration, you can put a bow, or cookies in the form of an asterisk.
4 schemes for adding flowers: lotus, tulip, rose, lily
In any decor, the floral theme is traditionally in the lead, table setting is no exception. Try to “grow” a lotus, a tulip, a rose or a lily in stages according to our recipes. The table will be very elegant.Lotus
The flower, sacred in many religions, always keeps flowers and leaves clean. A symbol of divine power (the Egyptian god Ra was born from a lotus), purity, cordiality and fertility.
A serving napkin folded in this way will decorate any holiday. If the hero of the occasion is a man, choose shades of blue, if a woman is pink or lilac. White or red lotuses are suitable for a wedding table. White color is generally universal, such "flowers" are good for a business lunch.
Tulip
Symbol of spring, beauty, perfect love. According to an established custom, these flowers are given to women on March 8th. Tulip-shaped napkins can also decorate the table.
White color symbolizes purity of thought and trust - for business negotiations, decorate the table with appropriate napkins as a sign of openness of your intentions.
red tulips mean love, passion and fidelity - use this symbolism in the table setting for the next anniversary of family life.
If you have decided to part with your partner and want to arrange a farewell dinner, please, here you are yellow tulips. Although in the East a different meaning is attributed to yellow tulips - this is a compliment: “Your smile is like the sun!”
Dark purple color- royal blood, nobility, nobility. Such tulips-napkins can be used to decorate a status table: on the occasion of a solid anniversary, the reception of significant guests, the celebration of major projects with serious partners ...

Rose
The queen of flowers. In Ayurveda, it is considered blissful along with the lotus. It symbolizes divine ideals and earthly passions, innocence and fertility, the triumph of life and the mystery of death.
Napkins folded in the form of roses will be a wonderful decoration for a wedding banquet, Valentine's Day, any women's holiday. The daughter will be pleased with pink roses, the spouse will appreciate the red flowers that tell her about the strength of your feelings. But a man should not be given roses for his celebration, even from napkins.
Lily
The lily has conflicting meanings. A Slavic female amulet, a European royal flower... But in the Renaissance, the rulers branded criminals with their emblem - probably everyone remembers the Three Musketeers.
White lilies symbolize purity and innocence, which is why they are often given as wedding gifts. But - and on mourning days, since these flowers also mean life "on the other side" and the atonement of sins.
Accordingly, napkins-lilies will be appropriate both on the festive and on the memorial table. If there is Lily among your relatives and friends, decorate the table on her holiday with namesake flowers.

Crown
The way of folding is close to a lily. Suitable for any event, just choose the colors in the appropriate style. By the way, if you have napkins that match the tablecloth, try to make them from a thinner material - this will look more advantageous.
Heart
Everything is clear here: love, Valentine's Day and just a way to express your feelings to a partner, mother or child. See an example of how you can set the table using this scheme.
Fan
Universal option. Bright napkins are suitable for a warm dinner in a friendly or family circle, a cheerful drawing can be laid out on a children's table, while white ones will add solemnity to the moment. And these step-by-step photos will help you!
Butterfly
Gentleman's accessory. Put the butterfly on a plate by February 23, or on the birthday of a boy or man. If the representative of the strong half of humanity is harsh and serious, choose a strict color scheme.
Bunnies

Perky rag bunnies will delight children and adults, suitable for Easter, Valentine's Day (rabbits also have long ears, and they are a symbol of reproduction), and indeed for any holiday in a close circle. For official receptions and sad occasions, hares, of course, are out of place.
If it’s difficult, watch the video instruction that even a child will learn from:
With a place for a guest card: 2 schemes
Napkins folded according to the following two schemes have space for a business card. First of all, these options are good for business lunches and dinners: at some conferences, events, where there are a lot of people who do not know each other.

You can decorate with such napkins a big family celebration - an anniversary or a wedding, if you plan in advance who to plant with whom. Little guests at a children's birthday party will also be delighted - just choose a bright color, and instead of a business card, you can put a photo of the child and candy.


With napkin ring
If you are thinking about how to beautifully fold napkins on a festive table for the most solemn occasion, stop at this elegant option. Such a stylish decor is worthy of a wedding, an anniversary, a graduation, and even a summit.
Previously, napkins were hung by the collar, now they are placed on your knees. And the hosts should be the first to do this, so they give a signal to start the meal.
"For appliances": bag and envelope
The last two schemes use paper napkins, from which a bag and an envelope for a spoon, fork and knife are folded.
The table, where there are no cloth napkins, is suitable for a buffet celebration or informal meetings in a close circle.

The festive decoration of the table at the wedding consists not only of cutlery, flowers, tablecloths, but also of napkins.
This accessory allows you to emphasize and complement the theme of the celebration. Napkins on the wedding table can vary quite a lot according to various criteria.
Also, their use at a wedding is purely practical, because they allow you to remove dirt or food residue from your hands, clothes or table. When choosing napkins, you need to take into account a large number of factors, including color, material of manufacture and decorative design.
Napkins for the wedding table may vary according to the following criteria:

- Size. There are options with dimensions of 35x35 cm - 45x45 cm, they are ideal for breakfast, lunch or dinner. Varieties with dimensions of 25x25 cm - 35x35 cm will be the best choice for a celebration, and therefore they are most often used at wedding ceremonies.
- Manufacturing material. There are fabric and paper varieties.
- Decorating method. There are hemmed napkins, as well as products with fringe. The first option can be used at all meals, and the second is served exclusively for a tea or coffee table.
Paper
The presence of paper napkins is a must at a wedding or any other celebration. Their main purpose is to clean the lips and hands from the remnants of food. For they are used quite rarely.
fabric
 Cloth napkins are also desirable to lay out on the wedding table. Their main purpose is to decorate the table and protect guests' clothes from contamination.
It is with the help of fabric options that you can create various unusual patterns from napkins. Thus, the best solution would be to use both paper and fabric varieties at the wedding.
DIY paper napkin decorations for a wedding
 To make such accessories at the wedding look attractive, they need to be folded beautifully. To date, there are a large number of options for creating unusual shapes from napkins.
Often, the color of white linen is used for the purpose of decoration, the product itself must have a square shape and be treated with starch, otherwise it will be extremely difficult to create a stable figure.
Flower
A wedding is a tender and romantic holiday, so various flower decorations are often used for decorations.
To support this style of design, you can use flower-shaped napkins. After creation, the decor is placed in a glass with a high stem.
When choosing a color scheme for decoration, you need to consider the tone of the whole style.

The process of creating a composition itself consists of the following steps:
- The square piece is folded in half. The fold line is smoothed by hand.
- After that, the decoration is folded in half again to give it a square shape again.
- An accordion-shaped blank is created diagonally. As a result, 3 folds with a width of about 2.5 cm should form.
- A small corner formed in the upper part must be bent inward. Then, pressing the composition in the center, its edges are slightly stretched.
- The decoration is placed in a glass with an angle down, the ends are neatly distributed along the walls of the container.
- By repeating the previous procedures, several more layers of petals are created.
Fan
 Wedding napkins in the form of a fan placed in a glass will look attractive.
The decoration looks beautiful and elegant, and no special skills are required to create it.
To make the fan durable, a special ring is used to secure the base of the figure.
The procedure for creating such an ornament consists of the following steps:

- The starched product is placed face down on the table.
- The fabric is folded in half with the wrong side inward. The fold line is well ironed. The product opens and returns to its original state.
- If a rectangular shape is used in the work, then one side with a smaller width should be folded into an accordion. When using a square napkin, the choice of side does not matter. The product is folded like an accordion with a fold width of no more than 1.5 cm. Having assembled the figure to the middle, you need to check that the folded layer perfectly matches the central line.
- The process of creating an accordion is completed.
- The resulting fan is folded in half.
- The end of the figure is threaded into the ring. The resulting figure is placed in a transparent glass, ring down.
hearts
 To maintain the romantic mood of the celebration, you can create a figure in the form of a heart.
The creation process is not very complex and therefore does not take much time.
If the style of the holiday allows, then it is better to create such decorations in a pink or red hue - this will provide brightness and beautifully decorate the banquet table.
Such "hearts" are laid out on plates or placed in a napkin holder.

Instructions for creating shapes in the form of a heart are as follows:
- Opposite corners of the napkin are folded together to form a triangle.
- One acute angle is bent up to the central part of the triangle.
- The previous step is repeated for another sharp corner.
- The product is turned to the back. One layer must be folded outward so that the corner is in contact with the other corner.
- The remaining upper corners are bent towards the middle.
- The upper sharp corners are bent to make the heart circular. The figure is flipped to the other side.
marquee
The tent is created from paper or well-starched fabric. The process of creating such a figure consists of the following steps:

- The napkin is folded in half horizontally, the fold should be at the top.
- The fabric is folded into a triangle, for this the lower left corner is combined with the lower right corner.
- The right corner of the formed triangle is shifted to the left.
- The actions of the second stage are repeated, then the lower right corner is shifted to the left.
- The right half of the product is bent to the left and the figure is laid in such a way that its edges do not wrinkle.
leaflet

A leaf-shaped figure is also best created from paper or carefully starched fabric. To do this, you will need to perform the following steps:
- The napkin folds diagonally in the form of an accordion.
- The figure is folded in half.
- To secure the middle of the decoration, you can use a regular fork.
How to decorate a wedding with do-it-yourself figures from fabric napkins
It is not very difficult to create unusual figures from fabric on your own. It is only necessary to carefully adhere to the technology of performing work, and then the result will not be long in coming.
This video will show you easy ways to decorate your wedding table with original napkins:
The resulting figures will help not only decorate the celebration, but also allow you to surprise guests with your abilities.
Rose
The figure in the form of a rose will look stylish and gentle at the wedding. You just need to choose the color of the decoration according to the style of the celebration.
A rose created using a combination of pink, green and red shades will look good.

The process of creating such a figure is as follows:
- The first step is to form a rosebud. To do this, the napkin is folded diagonally from different sides.
- The resulting triangle is folded into a strip about 5 cm wide.
- The strip is twisted into a roll, which will be a flower bud.
- The ending is fixed in the inner part of the bud.
- Green napkins, which will play the role of flowers, are collected from different ends towards the center. From the remaining ends, the sides are bent 2-3 cm in the same direction.
- The green decoration is placed in containers. The created bud is mounted inside.
Fan
A fairly common technique for folding napkins is to create a table fan.
Such products can be created from various fabrics.

The process of creating such a decoration consists of the following procedures:
- The base is doubled.
- On the one hand, for most of the length, the figure is assembled into an accordion, while the first fold should be placed inside.
- The accordion bends down.
- The section not folded like an accordion is bent, while the end of the corner should be between the folds.
- The fan is straightened and placed on the table.
Plain and French envelope
Envelopes for cutlery are often created for table setting on holidays. They allow you to protect forks, spoons and knives from getting dirt on them.
Creating such figures yourself will not be a problem.

The creation instructions look like this:
- The starched fabric is folded 4 times until a square shape is formed.
- The top layer of the figure is turned away from corner to corner diagonally. The resulting line is gently smoothed out.
- The same procedure is repeated for the next layer of fabric. But this time the side is not bent to its full length: there should be a small gap between the layers. It is necessary to check that the bent corners are at the same level.
- The third is formed similarly to the previous ones.
- The napkin is unfolded with the back side so that the layers are turned with the front part to the table.
- The figure is assembled with corners to each other and wrapped about a third of the width. The fold line is ironed so that the product retains its shape.
The result is a French envelope. To create a regular envelope, you will need fewer layers.
The bow tie
Creating a figure in the form of a bow tie is a very unexpected decision. Such decorations are suitable for any style of wedding.

The work on creating such a decor is as follows:
- The fabric is folded from both sides to the middle. The edges should meet in the center.
- After that, the already bent sides are bent inward again, the edges are also directed to the central part.
- The smaller edges are folded with an overlap.
- The corners of the napkin on one side are gathered into reduced triangles to reduce the width of the figure. Reduced sections are pushed into the inside of a wide figure.
- In the middle, the fabric is pressed down, the two symmetrical sides straighten out.
- The resulting bow tie is decorated with any decoration.
This video will teach you how to make your own wedding napkins:
Creating jewelry from napkins is not particularly difficult. When choosing the color and style of the figures, you must first of all pay attention to the overall design of the celebration. The decorations created should not stand out, but rather be combined with the general style of the wedding or picnic.
Paper wedding decor is very relevant today. Paper flowers bloom on banquet tables and wedding arches, origami cranes flutter in photo booths, multi-colored garlands decorate the halls, and figurines of newlyweds on the cake are increasingly replacing paper flags and turntables. Such decor is always pleasing to the eye, and it is also very easy to manufacture, as you can see by studying our master classes.
1. Round fan turntables, as well as panels and garlands from them
A round paper decoration, which is conventionally called a fan turntable (although it does not spin), is very easy to make with your own hands. And it’s even easier to find a use for it: you can use turntables to decorate a photo zone, decorate an arch, and even as a cake topper.

So, we will need:
- Heavy paper
- Buttons with large holes
- Glue stick or glue gun
- Rope or string
- stapler
- Scissors
- wooden sticks
- Ruler and pencil
- Hole punch (optional)

Step-by-step instruction:
1. Cut the paper into strips and fold them like an accordion. The width of the strips and the pitch can be varied. Please note that the width of the strip is the radius of your future turntable. To make the step even, you can mark the paper with a ruler and a pencil.
2. Connect the edges of the strip with a stapler.
3. Bend the workpiece as shown in the picture, apply a little glue to the middle and glue a wooden stick into one of the folds to secure the shape. Adjust the length of the stick to the diameter. If the paper is stiff and holds its shape on its own, you can do without sticks.
4. Fasten the buttons in the middle (on both sides) and connect them with a string.
The spinner is ready!

To make the turntables hang vertically or tie them into a garland, make holes on the edge with a hole punch and thread a rope through them. Also, turntables can be connected to each other with wooden sticks using glue - you get a rigid panel.

It is not necessary to decorate the middle with buttons - you can leave it as it is, or, for example, stick small circles of colored paper there.

2. Paper heart garlands
A budget and cute idea is to make a garland from improvised materials. You can decorate the bride's room, the exit registration arch or the entrance to the restaurant with such garlands.

Materials and tools
- color glossy magazines
- scissors or a heart-shaped hole punch
- sewing machine
Step-by-step instruction
Cut out hearts from magazines. This can be done manually, according to a template, you can cut it without a template - then each heart will be unique. But the easiest way is to use a heart-shaped figured hole punch, you can buy it in scrapbooking stores.


Sew the hearts one by one 
The garland is ready!


Other examples of heart garlands. Hearts can be cut out of books with text - such garlands are suitable for a vintage wedding. You can cut them out of old notes, cards, or simply from beautiful colored paper.


3. Paper pom-poms
Airy, fluffy paper pompoms are a budget-friendly way to decorate a wedding. They are good because they are made quite simply and quickly, and they can also easily decorate a large area. Another plus of such decorations is that they can be used to create a certain color scheme in the decor. In the article you will find examples of using pompoms and a master class on making them from crepe or tissue paper.

Paper pom-poms are universal - they can decorate napkins, bonbonnieres, a restaurant hall, a bride's room, a wedding arch. They will give any element an elegant and festive look.
One of the most common and most effective ways to decorate with paper pom poms is to hang them from the ceiling at different heights. They will create a festive atmosphere and give a certain color accent to the interior. 


Pompoms can be used to make garlands.


They can be attached to the wall, make a pattern out of them. You can create a monogram from them with the initials of the young.

Large pompoms can simply be placed on a sofa, piano or on the floor.

Small pom-poms can be used to decorate napkins.

An example of decorating a wedding ceremony with paper pompoms.

If the wedding is celebrated in nature, you can decorate tree branches with pom-poms. They can also be made a bright accessory for a photo shoot.


Paper pom-poms can be used as artificial flowers and to decorate a graceful tree branch.

You can decorate your wedding car with them. This option is only suitable for spring and summer weddings. From rain and snow, fragile pompoms will quickly lose their shape.

The master class will tell you how to make paper pompoms yourself.
You will need:
- Crepe or tissue paper or thin wrapping paper
- Scissors
- Thin wire or thread
Step-by-step instruction:
1. Cut the paper into A4 sheets (approximately 20*30 cm). For each pom-pom you will need 8 sheets of paper. You can choose larger or smaller sheet sizes. The width of the sheet will correspond to the diameter of the pompom.
Fold like an accordion with a fold width of about 1.5 cm.
2. Bend the workpiece in the middle, tie it tightly with wire or thread at the bend (i.e. in the middle). If you plan to hang a pom-pom, make a loop out of wire or thread.
Trim the edges of the workpiece on both sides. The picture shows two options - you can cut it in a semicircle or a triangle. The pompom will either have rounded edges or sharp edges.

3. Spread the paper and "fluff".

4. You will have such a cute pom-pom.


4. The simplest vertical garlands
How to make vertical paper garlands with your own hands, our master class will tell.

You will need:
colored paper,
- scissors,
- glue.

Step-by-step instruction:
1. We take a strip of colored paper and make cuts in increments of about 2 cm (we do not cut to the end, we leave a "reserve").
2. We cut the rectangle on the other side between the cuts already made, again not reaching the edge.
3. We get a blank for a garland. If it is not long enough, we make several more similar segments and glue them into one.
4. Stretch the resulting strip.

Vertical garlands are good when there are a lot of them. Hang them side by side, at a short distance. You can make multi-colored garlands or white ones, depending on the chosen wedding palette. Decor in the form of paper garlands is appropriate not only for a wedding, but also for other holidays, including children's. By the way, children will be happy to take part both in the manufacture of garlands and in decorating the room with them.

5. Paper flowers
An alternative to floral arrangements is flowers made of thick paper. They look very unusual and stylish. Making them is not a big deal. We will show you a detailed master class on how to make a stylized poppy out of paper. After that, you will learn how to make different paper flowers based on the same technique - from naive daffodils to elegant roses.

Materials and tools
- sheets of plain paper or cardboard for patterns, a pencil and an eraser
- thick colored paper in several colors
- scissors
- glue (it can be replaced with building double-sided tape or wire)
Step-by-step instruction
1. Make a pattern for the petals. The size of the petal can be any, depending on the size of the flower you want to get. Circle the pattern and cut out 6 petals.
2. Bend the petal with a fan (accordion) so that the lines converge towards the center.
3. At the base of the petal, make an incision in the center

4. To shape the petal, fold the two halves of the bottom of the petal together and glue them together. (see photo)
5. Glue 3 petals of the same size together.

6. Make another "flower" of 3 petals and put on the first "trefoil", glue them together

7. Getting to the core. Cut out 2 circles from yellow and black paper, cut evenly from the edges to the center, twist the ends inward.

8. Glue the core to the center of the flower.
9. Cut out a leaf, glue to a flower

The flower is ready.

Based on the same technique, you can make very delicate flowers in pastel colors.

The shape of the petals of these flowers is smooth and rounded.


Also, very elegant flowers in burgundy and purple are made in a similar technique.

The shape of the petals can be round or pointed.

The petals of these flowers are not corrugated. The assembly takes place not on glue, but on wire.


Giant flowers can be used as table decorations, for the decoration of the restaurant hall and exit registration, you can make a “bride bouquet” or decoration for a wedding arch.


An example of an exit registration arch made from paper flowers.


6. Turntables on a stick and without

You will need:
- colored cardboard sheet
- stick - for small turntables, sticks for canapés (sold in supermarkets) are suitable, for larger turntables, you can use sticks to support flowers (sold in flower shops and large construction supermarkets)
- button, bead, any decorative element
- scissors
Step-by-step instruction:
1. Cut a square out of cardboard

2. Cut it as shown in the picture

3. Bend in turn every second corner to the center and glue it

4. Glue a decorative element to the center of the spinner, glue a stick on the other side 
5. If you want the spinner to rotate instead of decorative, then instead of gluing a decorative element, attach the paper part to the stick using a pin with a pearl on the end.


7. Corrugated paper garlands

To make a garland you will need:
- several rolls of crepe paper in bright colors (available at office supply stores)
- scissors
- glue or glue gun
- base stick for a garland (it can be replaced with wire)
Step-by-step instruction:
1. Cut the paper into strips 10-15 cm wide

2. Fold each strip in half and cut it from the edges to the center, leaving 2 cm to the fold

3. If the length of the strip is not enough (it is less than the height of the arch), glue the end of one strip with the beginning of the other, so that the strips become twice as long

4. Now let's start building a structure that we can quickly install when decorating a wedding, and not attach one garland to the arch.
To do this, you need to attach the garlands to a stick (if the arch is in the form of a rectangle or to decorate the wall behind the newlyweds) or wire (if the arch is in the form of an arc).
Glue the ends of the garlands to the stick/wire in succession and let dry.
5. Now you can wrap all the garlands on a stick so that they do not get tangled during transportation. 
Look how beautiful the backdrop of these garlands looks!

Garlands of such rich colors will perfectly fit into the style of a Hawaiian wedding.


8. Paper flags and garlands of them
You can diversify your wedding photo session with the help of interesting signs, banners and flags with cute inscriptions. We have put together a collection of 44 examples of such accessories for wedding photography with different inscriptions and drawings.


