For craftswomen who love all sorts of new creative ideas, as well as hand-made beginners, we recommend making flowers from corrugated paper with your own hands - this is an incredible experience you can use in any festive or everyday situation.
Big flowers can be placed in a large vase, and they will significantly decorate and “revive” the interior. A surprise bouquet of paper flowers with candies can be presented for the birthday of a loved one or given to a child with a sweet tooth.
You can use paper flowers decorate a living room or restaurant hall, they can be used as boutonnieres or made into bouquets and artistic compositions.

Flowers made of corrugated paper will not wither like living plants and will not fade in the sun like plastic ones. Such light and natural material as paper is easy to process, does not cause allergies and does not harm the environment. It is a pleasure to work with both adults and children.
All you need is several rolls of multi-colored corrugated paper, scissors, glue, good mood and a step-by-step master class. We are armed with detailed instructions and are ready to teach you how to make incredible bouquets step by step.
Corrugated paper flowers: photo instructions for beginners
Paper flowers are the perfect decor for almost any holiday or event. If you learn how to make flowers yourself, it will be quite budget option for decorating the hall or making individual souvenirs for guests and visitors of the event.
Detailed photo instructions and our tips will help you make almost any paper flowers with your own hands. Corrugated paper you can make the following flowering plants, which cannot be distinguished from living ones:
- tulips;
- peonies;
- roses;
- chrysanthemums;
- chamomile;
- orchids;
- and in general - any flowers.

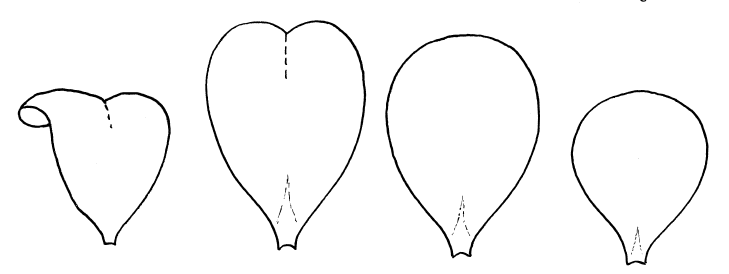
First flower - corrugated paper chrysanthemum, which will be easy to do even for beginners. Gather several sheets of paper into an accordion and then fasten them with thread.
What's great about the following designs is that you don't have to cut out each petal individually; you just need to roll up a piece of corrugated paper and properly process the edge, according to the type of flower.

Try to do it yourself spring dandelion, delicate carnation, lush peony or a touching chamomile.

For greater clarity, you can use templates for making flowers from paper.


Finished petals will also help you make the perfect paper flowers.
Beginning hand makers get a lot of help when creating incredible floral masterpieces. video lessons with detailed comments from masters.
How to make flowers from corrugated paper for interior decoration?
Volumetric paper flowers often used when creating festive interior design.

They are hung from the ceiling, tied to the backs of chairs and tables, decorated with walls and placed in huge vases.

Full size flowers will serve as an unforgettable attribute of the original photo shoot. And these giant flowers are quite easy to make.

Huge white roses They will become a wedding decoration and a chic detail for a festive photo zone. They can be made according to a template.


Delicate and colorful spring flowers can be attached to the wall,arch or special screen.
How to make paper flowers: making bouquets
Today it is hardly possible to surprise with an ordinary bouquet, but bouquet with sweets hidden inside– this is a real surprise for those with a sweet tooth. If you know how to make flowers from corrugated paper, consider that you have already come up with an original and beautiful gift for March 8 or a birthday for your loved ones.

Making a flower will not take you much time. And with the help of photographs and detailed explanations you will succeed wonderful English rose with candy inside.
We suggest you study MK.


Crafts made from paper flowers often decorated with beads, leaves, decorative details. Use a vase or small basket as a base.

What other flowers can be made for a bouquet? Yes, any - it can be small pansies, exquisite orchids or delicate peonies.

I would like to dwell on the production of peonies in more detail.
To work you will need:
- white corrugated paper;
- food coloring or watercolor;
- water in a spray bottle;
- round microwave bowl;
- scissors;
- glue gun (hot);
- tape;
- floral wire for a stem or an old element from an artificial flower.

- Take paper and cut out a petal.
- Rotate the microwave bowl and attach the petal to it.
- Spray water from a spray bottle.
- Painting the petal paints of different shades.
- Place the bowl and petal in the microwave for 30 seconds or until completely dry.
- Carefully remove the petal from the bowl. It will be concave in shape.
- We prepare the wire or old stem for gluing the petals.
- Attaching the middle and glue the petals around it.
- We decorate the stem with tape.
DIY corrugated paper roses step by step
The rose is a noble flower and at first glance it may seem that it is very difficult to create this miracle on your own. We'll show you simple master classes on making roses from corrugated paper with your own hands step by step, and you will be convinced that this mission is not only doable, but also very enjoyable.

Such a rose you can make it with your child.

More large and lush roses you can do with this simple master class:
- You need to cut a fairly long strip from corrugated paper (the larger the strip, the larger the bud will come out).
- Wrap paper around wire- this will be the base of the bud. When winding a bud, each layer must be wrapped with glue.
- We cut out the petals of our future rose from paper - different in size and shape, so that the rose seems natural.
- Glue the petals to the base, apply glue to the underside of the petal.
- We use green paper to make sepals, which we will glue to the base of the bud.

Another master class will tell you how to beautifully pack a bouquet for a gift.
Video: how to make flowers from corrugated paper
You may like:
- Tips that will be useful for both beginners and...
Cardboard vase (with your own hands). Manufacturing process. DIY vase made from corrugated paper
DIY vase with flowers made of corrugated paper: master class with photos
In this simple master class we will make a vase of flowers with our own hands, which can be presented as a gift or used as decoration.
To make it we will need:
- for the vase and flowers, corrugated paper of the desired color;
- green organza;
- organza ribbon;
- napkin cylinder;
- cardboard;
- pencil;
- wooden skewers;
- scissors;
- glue gun
How to make a vase of flowers from corrugated paper
As a base for the vase, you can use a cardboard cylinder from napkins or toilet paper. We cut the cylinder to the length we need. If this is not the case, then cut out a rectangle of the required size and glue the two edges. 
On cardboard approximately the same color as the cylinder, trace one of its round sides and cut out this circle. Apply glue from a gun to the edge that was outlined and attach this circle. If the edges of the circle protrude slightly beyond the edges of the cylinder, then they need to be cut off. 

Now we take the corrugated paper from which the outer part of the vase will be made. Cut out a circle with a diameter 2 cm larger than the bottom and glue it exactly in the middle, leaving 1 cm indents on each side. We make cuts along the edge, turning it into a fringe. 
We cut a strip across the corrugation with a length slightly larger than the circumference of the vase and a width of 3 cm. We glue it along the entire upper edge of the vase, first from the outside, then bend it and glue the remaining half to the inner wall. 
Now let's decorate the front of the vase. We cut a strip across the corrugation with a length slightly greater than the circumference and a width equal to 1.5 times the height of the vase. We paste this strip over the vase, fastening the edges. The excess paper should be at the top of the vase, and the edges should match at the bottom. 
We turn the free edge of the paper outward and form a volume. 
We secure the edge by tying it just above with an organza ribbon. 

Let's start making flowers. Corrugated paper must be cut into strips of different widths and lengths across the corrugation. We bend each strip in half, being careful not to stretch the fold and make it flat. 
We take a wooden skewer, apply glue from a gun to the edge and secure the edge of the tape folded in half. We begin to twist the strip in a circle until the end, while the fold should remain voluminous. We secure each new layer with glue. 
>We will make something like leaves from green organza. Cut out squares of arbitrary size. We bend it so that all the corners are on the same side at the same distance from each other. 
We place a flower in the middle of this blank. First, glue one side to the skewer under the base of the bud, and then the other, thereby wrapping the flower in organza. 


Leave the length of the flower stem so that the bud touches the edge of the vase. Now we apply more glue to the end of the stem of each flower and insert it into the vase, fixing it in the desired position for a few seconds. This is how we make a bouquet. 


This is how easy it is to make a decorative vase with flowers from corrugated paper with your own hands. 

Onwomen.ru
20 photos, master class on how to make a vase
 DIY vase - master class on how to make a flower vase from candies. For this we will need wire, white tape, cardboard, penoplex, sisal fiber, cotton swabs, white lace ribbon and candy flowers.

Cut out a circle of thick cardboard and two strips with a width of 1 cm. from corrugated cardboard.

We take cotton swabs and prepare them by removing the cotton wool.

We only need clean white sticks.


We tape it (that is, we wrap the wire with tape).

We glue such a blank to a circle of cardboard.

Then we glue a strip of corrugated cardboard and insert sticks into it.


Cover everything with white corrugated paper.

We attach a second strip of corrugated cardboard on top.

We make spirals from wire to decorate the vase and attach them along the top edge.

We decorate the vase with a white lace ribbon.

We cut out a blank from penoplex to the size of the vase and decorate it with sisal fiber.

Fill the vase with flowers.

Our DIY vase is ready!


bukety-iz-konfet.ru
DIY vases - beautiful and easy
Recently, more and more people are interested in handmade items. Such activities distract from routine, calm the nerves and bring undoubted benefits. And the results of your own creativity can be used for decoration, as well as please friends and family with original gifts. If you love flowers, then the question of where to put them sooner or later comes up on the agenda. We offer you several simple and original ways to make vases with your own hands.
Corrugated paper vase
It will require a glass base, such as a glass, bottle or jar. The base must first be washed and degreased with alcohol or acetone. For decoration, it is best to use corrugated paper, or you can take pages from old magazines.
Important! If you decide to decorate the base with corrugated paper, then select suitable colors and cut the paper into strips or into small pieces of any shape. The shape is not important, it can be squares or diamonds.
Creative process:
- Lubricate the walls of your glass base with glue and glue strips or pieces, alternating colors in the desired sequence.
Important! When gluing, the strips of paper should overlap each other slightly.
- This way you cover the entire base.
- When everything is dry, cover the product with several layers of varnish.
- Decorate the vase with beads, rhinestones, ribbons, shells, buttons, in general, everything that is dear to your heart or is lying around idle and would be a pity to throw away.

Vase made of newspaper tubes
Such products look very original and beautiful, and most importantly, no one will immediately understand what it is made of. How to make such a paper vase with your own hands?
- First of all, the blanks of the tubes themselves are prepared. We will make them from old newspapers or magazines. You can form tubes using knitting needles. The thinner the knitting needle, the thinner the tube will be.
- For the base you will need a cardboard cylinder. If you don’t have one ready-made, you can make it from whatman paper.
- Now we glue this base with tubes. The tubes are glued close to each other. In this way, the entire base is glued in a circle.
- Two tubes are glued horizontally at the top and bottom. To give them the desired shape, you can first wrap them around your finger.
- The top is cut with ordinary scissors to give the desired shape.
- When the glue dries, the product is coated with paint and then several layers of varnish.
- Now the bottom is being made. You can simply cut it out of thick cardboard of the required diameter and glue it to the bottom.
Important! Be sure to varnish the bottom, especially if you are going to use the vase for its intended purpose.
Hexagonal vase:
- Form a hexagon out of cardboard so that it has the shape of a vase.
Important! You can disassemble some box for this purpose. The edges must be carefully adjusted to each other and secured with a large stapler.
- Cut the corrugated cardboard into pieces and stick it on the workpiece in any order, leaving small, if possible equal, gaps between the pieces.
- Now fill these gaps with putty and dry. Try to do this carefully so that your vase looks good.
- When everything is dry, paint over the putty areas.
- Place a glass jar of water inside.
Do-it-yourself bottle vases made from bottles will look original. Any plastic, glass or plastic bottle is suitable for this craft. It can be any texture, shape and color you want. Maybe you have interesting colored glass bottles that, without decoration, can serve as a wonderful vase. They can also be covered with yarn, ribbons, twine, various beads and buttons, and pieces of material. The following master classes will tell you what can come of this.

Vase made of rolls
To do this, you will need a cardboard tube of medium diameter - it can be found in any hardware store:
- Cut the desired piece of cardboard tube. Attach it to a piece of cardboard and trace it. Cut out the bottom and glue it to the pipe with glue.
- Cut strips from old magazines. Fold them in half and then roll them into rolls. You will have to make a lot of such rolls, depending on your workpiece. You can involve children in the work - they will be happy to help you in this matter.
- Glue these rolls to the workpiece close to each other, thus covering the entire pipe.
- Cover the top of the pipe with these snails as well.
- Fill the gaps between the rolls with some material - beads, buttons, beans, other cereals or decorations.
- Paint the entire product with some bright paint of your choice, for example, red. Wait until completely dry.
You can shade the top with a darker color, or apply a translucent layer of gold or silver paint. Finally, fix everything with several layers of varnish.
Important! If you plan to use your craft for its intended purpose, then it is advisable to coat it with a primer before painting.
How to painlessly remove the neck?
- Make a line on the bottle to which you need to cut the neck.
- Take a thick wool thread, half a meter long, and soak it in solvent.
- Wrap the bottle along the line with thread 3 times.
- Light the thread while holding the bottle horizontally.
- After the thread burns, quickly plunge the bottle into cold water.
A sudden change in temperature will cause the glass to burst at the heating site. All you have to do is sand the chipped areas with sandpaper or a file.
Vase using decoupage technique
Recently, decorating various items using the decoupage technique has become increasingly fashionable. Its essence is that some kind of pattern is glued to the surface and secured with varnish. And glass bottles were no exception.
By decoupage you can make very beautiful vases for flowers with your own hands. What does the process look like?
- Prepare your drawing. There are special napkins on sale. But you can also use regular ones.
Important! If the napkin has three layers, you need to separate the bottom layer with the pattern. You can glue the entire napkin, or you can glue a separate fragment of it.
- First, degrease the base itself, in our case it’s a bottle. This can be done with alcohol or acetone.
- Then cover the bottle with white acrylic paint. Instead of white, you can choose another color that matches the pattern.
- When the paint is dry, apply PVA glue and apply the prepared design. Smooth it out so that there are no bends or cracks. The contours can be masked with paint of a suitable color.
- When the craft is dry, coat it with several layers of varnish, allowing each layer to dry thoroughly.

Snow vase
You can make a real snow beauty from a simple bottle and coarse salt:
- Spray the bottle with primer.
Important! This is best done in the fresh air or in a well-ventilated area, away from children and allergy sufferers.
- Lay a newspaper or cloth and sprinkle coarse salt on it.
- Spray the bottle with sticky spray.
- Place the bottle in the scattered salt and roll until the entire surface is evenly covered with white salty “snow”.
In this way, you can make several vases, place them on a tray, and sprinkle salt to imitate snow. The result will be a beautiful Christmas composition, which can be supplemented with candles, fir branches and other attributes of the coming New Year.
- Apply glue to the jar and begin gluing on the sequin ribbon.
Important! Please note that the glue dries quickly, so work on small areas. It's best to start from the bottom.
- The layers of ribbon should lightly touch each other.
- The neck of the jar can be tied with a beautiful ribbon.
- Touch up the top part of the jar that remains uncovered with tape.
Important! You can cover the jar with multi-colored pieces of electrical tape. It turns out very interesting and original.
- Cut the bark from a birch tree, wrap it around a base, for example, around a jar, and you will get an original vase.
- You can collect branches of the same length and paste them over a jar or other suitable container.
- Beautiful products are obtained by covering the base with acorns, small cones or other gifts of the forest.
Video material
Now you can choose a suitable vase design to suit your taste and turn it into a wonderful decorative item with your own hands, because we offered you a lot of ideas in the article, and all of them are easy to implement!
serviceyard.net
master class and execution diagram
Vases of various shapes and sizes are an integral element of interior decor, which creates comfort and a unique atmosphere in the house. You can make a vase yourself from various materials. For those who want to decorate their home with artificial flowers or dried flowers, a DIY cardboard vase is an excellent solution. The material for such a vase is available to everyone, and the finished product will look no worse than porcelain.

Master class on making a vase from cardboard
The vase from this master class can be either floor or tabletop, depending on the chosen height. In addition, if you saturate it with a construction primer in 2 - 3 layers and transparent varnish in 3 - 4 layers, it is quite possible to put fresh flowers in it.
To work you will need:
- Medium sized cardboard tube (found at a hardware store) and sheet paper
- PVA glue and superglue
- Old newspapers or magazines
- Paints
- Clear nail polish
Let's start working on our vase
First you need to cut a piece of cardboard tube to a suitable length. Trace the bottom on a piece of cardboard, cut it out and glue it with superglue.
Since our vase will be made of cardboard and paper, we begin to work with it. We cut the magazine sheets into strips, fold them in half and roll them into small rolls, securing them with glue.
Glue the rolls to the pipe tightly to each other.
We also glue the top part.
The gaps between the rolls can be filled with any beads or buttons or, as in this example, with beans.
We paint the entire product with bright paint and leave it to dry.
After this, we apply dark paint, and, without waiting for it to dry, we wipe off the excess with a sponge.
After drying, apply translucent gold paint to give the vase a noble shine. Then we cover it with 2 – 3 layers of transparent varnish. The vase is ready!
Unusual vase made from pieces of cardboard
Consider another interesting way to make a cardboard vase, which will pleasantly surprise you with its simplicity and effectiveness.
For this vase you will need:
- Cardboard used to make boxes
- Small diameter glass jar
- Marker
- Scissors
- Ruler
Let's start making a vase
To cut out the bottom for the vase, outline the bottom of the jar on cardboard and add 1 - 1.5 cm along the radius.
The rest of the cardboard needs to be cut into thin strips of the same width of 1 - 1.5 cm. It is better to draw it along a ruler.
We cut the strips into fragments of 3 or 4 cm, depending on the diameter of the future vase.
We begin to assemble a cardboard vase. We glue the cardboard fragments along the edge of the bottom so that they do not cover the inner contour.
We paste the second row in a checkerboard pattern in relation to the first.
We continue to work according to the same scheme, periodically inserting the can to make sure that it fits.
Once the entire jar is closed, the work can be completed. Leave the craft to dry overnight, and then it can be used. If you leave the jar inside, you can put fresh flowers in it.
How to make a vase from a cardboard box
In this example we will tell you how to make such an original cardboard vase:

To work you will need:
- Small rectangular cardboard box
- Corrugated cardboard
- Putty
- Paints
Stages of making a cardboard vase:
First you need to give the box a hexagonal shape.
We cut out triangles of different shapes from corrugated cardboard. Apply glue to the surface of the edge of the box and glue it with triangles, leaving gaps. We do the same with the remaining faces.
After the glue has dried, apply putty in the gaps.
Let the vase dry and paint with contrasting colors, darker in the spaces, lighter in the triangles. The vase is ready!
Floor-standing cardboard vase with original decor

Such a vase will decorate the interior of the room, and its production will not require much time and money.
For the floor vase you will need:
- Large cardboard box
- Scotch
- Pencil
- Paper
- PVA glue and ceiling tile adhesive
- Paper clips
- Pistachio shells for decoration
Stages of making a floor vase:
We make a pattern for a vase with a height of 60 cm or more. There should be 4 faces with the same width in the central part, two of which are rectangular, and two are curly. We connect them with tape and cut out the bottom.
We connect the edges with tape and attach the bottom. Cut out strips of paper and cover the neck with them. Until everything is dry, secure it with paper clips.

After drying, we begin to decorate the vase. Apply glue to the shells and glue them randomly. You can also come up with a suitable pattern. If desired, the vase can be decorated with any other materials.
The floor vase is ready!
Video on the topic of the article
For those who want to get new original ideas for creativity, we have prepared a selection of video master classes on making cardboard vases with your own hands:
sdelala-sama.ru
DIY paper vase. Kaleidoscope of colors
An ordinary glass jar or bottle can be turned into a colorful vase. To do this, you just need to cover the container with small pieces of corrugated paper of different colors.
It is better to use a container made of transparent glass, and for gluing the paper you can use either a special glue for decoupage or regular PVA glue, which must be diluted with water in a 1:1 ratio.
You will need:
Glass container
Scissors (if desired)

1. Prepare some corrugated paper and tear it into several small pieces. You can use scissors.
2. Prepare glassware and apply glue to a small area, then start gluing multi-colored pieces of paper.
* As you add pieces, lubricate new areas of the bottle (jar).
3. When you have covered the entire container with paper, apply glue to it and cover the container with another layer of multi-colored paper.
4. Also cover the second layer of paper with glue, which will become transparent when it dries.
*If desired, you can varnish the vase.
*It's worth noting that you can use magazine or newspaper pages instead of crepe paper.


How to make a vase from paper. Colored stripes.

You can use corrugated paper to cover glassware with stripes.
You will need:
Glass container
Corrugated paper in several colors
Scissors
* First you need to choose a suitable range of colors for the vase - these can be only cold colors or only warm ones. Or you can choose colors that symbolize something, for example, a flag.
1. Prepare corrugated paper and cut it into strips.
* Stripes can be of different widths.
2. Apply glue to the bottle in the place where the new strip will be.
* When gluing, make sure that the strips of paper overlap each other slightly.
* You can glue buttons, rhinestones, etc. on top of the strips.

DIY vase decor. Forest decorations.

You will need:
Plasticine
Seeds
Leaves and other decorations that can be found in the forest.
1. Cover a small vase with plasticine.
2. You can attach pumpkin or watermelon seeds, cereals, acorn caps and many other details, including leaves, to the plasticine.
You can make a similar vase with your children.
DIY bottle vase. Decorate with thread.

A very beautiful vase can be made using a bottle and colored yarn.
You will need:
Yarn (ribbons)
Decoupage glue (or PVA glue)
Bottle
Scissors
* To ensure that the thread sticks well to the bottle, use decoupage glue (you can replace it with PVA glue).
* Considering the fact that the glue dries quickly, it is better to apply it to a small area of the bottle's surface.
* The thread must be wound tightly, and it is advisable that there is no gap between the threads.

* You can decorate the bottle with one yarn, or you can use yarn of several colors.
* Threads can also be replaced with colored ribbons.
It is worth noting that the ribbons can be glued to a regular tin can, and you will get a beautiful, elegant vase.
* You can decorate containers of any shape in this way.


Here is another option, only rope is used instead of threads:

DIY vase (master class)

You can very easily make an original vase from a jar. You just need clothespins and the tin itself.
In addition to the fact that such a vase looks beautiful, you can also put a small glass of water in it, and put small forest flowers in it.

* It is better not to pour water into the jar itself.
*You can add a flower or a heart made of colored cardboard to decorate the craft.

DIY flower vase

You will need:
Glass jar
Corrugated paper in several colors
Scissors
PVA glue

1. Cut strips of corrugated paper.

2. Make a fringe on each strip of paper.

3. Start gluing the strips to the jar one at a time, alternating colors as desired.


How to make a vase from twigs yourself

You will need:
Small saw (optional, since twigs can easily be broken)
Bagging
Level capacity
Branches (preferably straight)
Jute thread
Superglue (preferably use a hot glue gun)
1. Collect several straight branches and break or cut them into more or less even pieces. It is desirable that these parts are slightly higher than the container itself.

2. Prepare a thread approximately 1.5 meters long and, starting from the middle of this length, begin connecting all the branches. After adding a new branch, tie a simple knot. As you can see from the image, two parts of the thread are used (top and bottom).

3. Continue tying branches until you have a long row of them. After this, carefully wrap your stick “mat” around the container to test the length and add or subtract branch(s) if desired.

4. Prepare a container and wrap it in bag cloth. Fold the fabric at the top and bottom and secure it with glue or thread. There is no need to try to wrap it carefully, since you will still cover the container with a “mat” of branches on top.

* If you want to plant a flower in such a vase, it is better to make several holes at the bottom of the container.
5. All that remains is to wrap the vase with branches and tie the thread.

You can place several small stones at the bottom of the vase to make it more stable.
DIY glass vase

You will need:
Glass jar
Braid with sequins
Super glue
Scissors

1. Start applying a little glue to the jar and sticking the tape on little by little. This must be done from below. Since the glue dries quickly, it should be applied to a small area of the container.
2. Continue wrapping the ribbon around the can. The layers of sequin braid should touch each other slightly.
3. Tie a ribbon for beauty and you have a beautiful vase ready.
* Instead of tape, you can paint the top of the jar (not covered with tape).
* Fresh flowers will be the finishing touch to your craft.
DIY winter vase
You will need:
A bottle of wine
Spray primer
Sticky aerosol
1. Apply a spray primer to the bottle (it is better to do this outdoors, on a balcony or in a well-ventilated area).
2. Pour coarse salt onto previously laid paper (newspaper).
3. Apply sticky spray to the bottle.
4. Place the bottle on the salt and start rolling it so that the salt sticks to the surface of the bottle. You have a vase covered with snow.
* For beauty, add a few twigs (natural or artificial) to the vase and you have a beautiful decoration for the holiday.
* You can make a couple more vases in a similar way, place them on a tray, add a candle and sprinkle salt around the bottles (fallen snow) - a beautiful decorative composition.
Bright DIY flower vase

DIY decorative vase
This example uses bamboo shaped straws, but you can use any shape of plastic straws.
It is desirable that the tubes be dense.


How to make a vase (video)
How to make a vase from a plastic bottle
DIY floor vase
It is not easy to make such a vase, but after painstaking work the result is surprising. In addition, you will save a lot of money by spending only a few hours.
In this simple master class we will make a vase of flowers with our own hands, which can be presented as a gift or used as decoration.
To make it we will need:
- for the vase and flowers, corrugated paper of the desired color;
- green organza;
- organza ribbon;
- napkin cylinder;
- cardboard;
- pencil;
- wooden skewers;
- scissors;
- glue gun
How to make a vase of flowers from corrugated paper
As a base for the vase, you can use a cardboard cylinder from napkins or toilet paper. We cut the cylinder to the length we need. If this is not the case, then cut out a rectangle of the required size and glue the two edges. 
On cardboard approximately the same color as the cylinder, trace one of its round sides and cut out this circle. Apply glue from a gun to the edge that was outlined and attach this circle. If the edges of the circle protrude slightly beyond the edges of the cylinder, then they need to be cut off. 

Now we take the corrugated paper from which the outer part of the vase will be made. Cut out a circle with a diameter 2 cm larger than the bottom and glue it exactly in the middle, leaving 1 cm indents on each side. We make cuts along the edge, turning it into a fringe. 
We cut a strip across the corrugation with a length slightly larger than the circumference of the vase and a width of 3 cm. We glue it along the entire upper edge of the vase, first from the outside, then bend it and glue the remaining half to the inner wall. 
Now let's decorate the front of the vase. We cut a strip across the corrugation with a length slightly greater than the circumference and a width equal to 1.5 times the height of the vase. We paste this strip over the vase, fastening the edges. The excess paper should be at the top of the vase, and the edges should match at the bottom. 
We turn the free edge of the paper outward and form a volume. 
We secure the edge by tying it just above with an organza ribbon. 

Let's start making flowers. Corrugated paper must be cut into strips of different widths and lengths across the corrugation. We bend each strip in half, being careful not to stretch the fold and make it flat. 
We take a wooden skewer, apply glue from a gun to the edge and secure the edge of the tape folded in half. We begin to twist the strip in a circle until the end, while the fold should remain voluminous. We secure each new layer with glue. 
>We will make something like leaves from green organza. Cut out squares of arbitrary size. We bend it so that all the corners are on the same side at the same distance from each other. 
We place a flower in the middle of this blank. First, glue one side to the skewer under the base of the bud, and then the other, thereby wrapping the flower in organza. 


Useful tips
If you want to decorate the interior, then start with a simple craft, such as a vase, which can be made from old plastic or glass bottles using paper, twigs, tubes, newspapers and magazines, and many other materials.
There are a huge number of master classes on making vases with your own hands.
Some of the most interesting and at the same time quite simple vases you can find here.
DIY paper vase. Kaleidoscope of flowers.

An ordinary glass jar or bottle can be turned into a colorful vase. To do this, you just need to cover the container with small pieces of corrugated paper of different colors.
It is better to use a container made of transparent glass, and for gluing the paper you can use either a special glue for decoupage or regular PVA glue, which must be diluted with water in a 1:1 ratio.


We weave the bottom of the vase:
Make 4 bundles of 4 strands
Fold all the strands crosswise
In turn, “launch” each tourniquet in a circle so that it wraps around the rest of the tourniquets
The first 3 rows are woven in a similar way. After this, the four strands need to be divided in pairs and weave 3 more rows in the already familiar way - you should already have 6 rows of weaving
Wrap each strand separately to get a bottom like this:


3. Weave the walls of the floor vase:
Protruding paper tubes need to be folded up
Start braiding each tube - you should have a vase leg formed
Prepare a pan lid or any other disc-shaped object wider than the bottom of the vase
Insert the cap between the paper tube drains
* The lower the lid, the wider the vase will be.
Using the already familiar technique, you need to weave 10 more rows
Now you need to start bringing the edges of the strands-stands closer together - preparing the neck of the vase
The neck of the vase needs to be braided until you reach the stage when you will need to braid two stand strands instead of one
Now spread the strands apart again and start weaving the rim of the vase
Take turns bending one post after another.


Take any transparent container: a glass, bottle or jar - and cover it with multi-colored squares of corrugated paper using PVA glue, stirring it with the same amount of water.
Multi-colored corrugated pieces on glass will look impressive and will greatly refresh a spring bouquet. Just don’t forget to cover the top of the paper with another layer of glue (then it will become transparent), and after drying, with varnish.
Vases covered with strips of corrugated paper of varying thickness also look interesting. If you want to make such a beauty, make sure that the stripes slightly overlap each other. This way the color transitions will be more original.
A vase made by yourself from paper will be a wonderful addition to your interior, and perhaps an unusual gift!
How to make a vase from a jar?
To make this exquisite vase, you will need bright, multi-colored electrical tape. Cover the jar with strips of electrical tape of different lengths and widths and evaluate how exclusive and original the vase you have turned out to be.

Vase from a bottle
How to make a vase from a bottle? First, find glossy magazine with bright drawings and cut its pages into squares.

Cut out pieces of the same color scheme, such as turquoise, blue, light blue and purple. To glue them to a glass bottle, use PVA diluted with water 1:1, or decoupage glue. Cover the vase with a layer of varnish.

Use a glue gun to attach the buttons to the vase. The main thing is don’t be afraid to experiment!

You can make a vase from a glass bottle in another way - for example, by simply gluing elements of openwork napkins!

Or maybe turn a bottle into a vase using piece of lace?

Wrapping a glass bottle colored threads or yarn, You will make a wonderful spring vase.

To make the threads stick better to the glass, dip them on one side in decoupage glue or PVA, or spread it on the bottle. But remember that the glue dries quickly, so smear the bottle in parts and pull the thread tightly.


To make the vase bright and original, use threads of different colors.

Decoupage - decorate a vase with your own hands
To beautifully decorate a purchased vase, you just need to cut out some nice picture from a magazine or postcard and stick it on the surface of the vase. However, it’s even better to purchase special napkins for decoupage, primer and varnish: first we apply primer to the surface of the vase, then we glue pieces of the napkin with the desired image, and finally we fix it with varnish! And it turns out to be such a neat vintage beauty.

How to make a vase from a plastic bottle?
To make this vase you will need the help of your dad or mom. Take a one and a half liter plastic bottle and cut several round holes in its upper part to insert the necks of cut half-liter plastic bottles into them and glue them with a special glue for plastic.

Place a flower in each hole of the vase.
This is how fancy and unique a handmade bottle vase can be!
Vase made of glass and balloon
Cut the balloon crosswise at its widest point. Pull the top over the glass and tuck the hole into the glass. Tie the glass with a string and tie a bow. Voila! The vase is ready! You can put a flower in the hole of the ball.

Plasticine vase
Oh, how interesting! Even a child can make this vase. To do this, you just need to cover it with plasticine and decorate it with various seeds, acorn caps or beads. Beauty!

Vase made of clothespins
Take a can of canned food and “garden” it with new wooden clothespins. That's all. The unique vase is ready. Only you probably don’t need to pour water into it. Place a small glass of water inside and flowers in it.
Vases made from natural materials
Cutting off birch bark(better with a cut or fallen one) and wrapping it in an ordinary jar, you will receive an original vase, and at the same time you will take a piece of the spring forest to your room.

Ideal for making vases tree branches, which can be used to cover a jar or flower pot.


How about a vase made of pencils?
There may be a jar or glass inside, and we will decorate it all with lace ribbons and beads.

I hope you liked my ideas, and you will certainly use them to create your own masterpieces. Good luck!