There are many wonderful things to do in the world of needlework. You can create real masterpieces with your own hands, one of which can be a beaded sakura. Weaving it is not so difficult as it might seem at first glance. In addition, on the Internet you can find a lot of ways of such weaving with a step-by-step description.
Blooming sakura is a beaded tree, the process of creating which you will enjoy no less than the result, because this is a very positive and creative process. Even if you have been beading for more than a year and have already remade many different crafts, this one will win your heart at first glance at the photo of the finished tree. Step by step to figure out how to create this magnificent bonsai, our micro and video tutorials will help you.
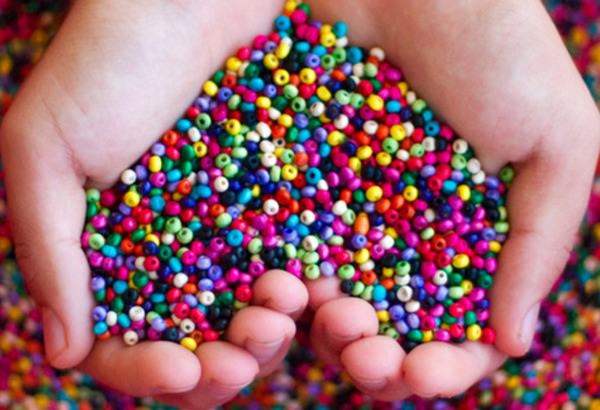
With your own hands you can create real masterpieces, one of which can be a beaded sakura
It is not difficult to make trees from beads, the main thing is to choose high-quality material and follow the instructions.
So, the master class:
- It is necessary to prepare the wire. It should be three times longer than the size of the future tree. Don't use too short a wire size as it will bend and possibly break.
- A branch of a tree should have pink beads on it. In order for the branches to be even, the number of wire turns should be constantly counted.
- Weaving side branches involves stringing 5 beads on them.
- When a branch containing 3 beads is twisted with other branches, you can weave a tree. Its assembly involves twisting all the branches together. To make the tree lush, it is worth making about 100 branches.
- The rest of the wire should be used as a barrel. Another piece of wire is wound on it. This is done to seal the trunk.
- The resulting branches must be attached to the trunk. But before you do this, you need to look at a photo or picture of sakura. This will help the master create the most realistic work.
- After the trunk has been formed, the ends of the wire should remain. They will be needed to secure the product on the basis.
Tip: the work will look more beautiful if the sakura stem is wrapped over the wire with brown thread. There is another option: you can wrap it with tape, and then paint it brown. You can also stick around the barrel with plasticine.
Gallery: sakura from beads (25 photos)


Weaving sakura from beads (video)
Weaving a branch of sakura from beads
The most beautiful thing in such work is pink sakura branches.
Scheme of work:
- The first step is to choose high-quality beads of pink and dark pink shades. The colors are mixed. A wire 50 cm long is also selected.
- 6 beads are strung on the wire. They should be located in the middle of the wire. Then a loop is made.
- Then 6 more beads are strung on the long wire end. A similar loop is made. The distance between each loop is approximately 1 cm. Thus, 11 loops should be formed on a 50 cm wire.
- Next, the workpiece is bent so that one loop is in the center, and the rest are against each other.
- After that, the wire is twisted, and with it all the loops are twisted. It turns out a small branch of sakura. To make the tree lush and beautiful, you need to make at least 100 such branches.
- After the blanks are ready, the branches should be combined. For this, 3 of them are taken and twisted together.
- You can combine blanks in a different way, for example, twisting not 3 branches, but 2 or 4.
- As all the branches are twisted, a long edge of the wire should form. The stem of the sakura will be made from it.

The most beautiful thing in such work is pink sakura branches.
How to weave a sakura flower from beads?
Cherry blossoms are loved by people from all over the world. However, not everyone has the opportunity to enjoy their view "live". Therefore, such a flower can be made with your own hands. It won't take long, and besides, the work is very beautiful.
So, the work plan includes the following items:
- It is necessary to select the materials necessary for the work. In this case, these are: pink beads, fishing line for weaving, a needle for beads and fishing line.
- The initial circle should be formed from 5 beads. Each of them will be a flower petal. The material is strung on a fishing line. Then, closer to the end of the wire, the circle closes.
- After that, the beads should be added to the row. In each row, you should add material of different sizes, so the flower will turn out more beautiful.
- Additional beads are inserted in the second and third rows. The fourth row is formed in the same way. This completes the weaving of the base of the sakura flower.
- Now you can start weaving the flower petals. In order to form a petal, it is necessary to add 3 beads to each bead from the previous row in the next row. The needle is held on the back of the work.
- In the next row, not 3, but 5 beads are added. And then again 3.
- The edges of the petals should be fixed. After this, the edges of each petal must be braided with a small material of a pink hue, which differs from the main one in color. It is desirable that the edges of the sakura flower be darker.

Cherry blossoms are loved by people from all over the world.
Tip: These flowers can be used as earrings.
What materials do you need to prepare for work?
- Beads. It is advisable to use high-quality beads.
- Wire or fishing line for weaving.
- Needle for work with beads.
- Thread. It is recommended to use white thread as it is less visible. You can also use a thread whose color does not differ from the color of the material.

It is advisable to use high-quality beads
Tips for beginner craftsmen on working with beads
If, when working with this material, you follow a few rules, then you can not only get a lot of pleasure from the work process, but also save time.
Here are some of these rules:
- Beads should be stored by color. To do this, it must be stored either in small bags or in jars. If suddenly the material of different colors is mixed, then before work it is worth sorting it out and sorting by color.
- It is much more convenient to work with a fleecy fabric, for example, with velvet. When a person weaves, he can easily pry off the bead without touching it with his hand. This will facilitate the task and reduce the time allotted for work.
- Those needleworkers who have vision problems are advised to consult an oculist before such an activity. The fact is that working with this material greatly strains the eyes. This can adversely affect a person's vision.
- Beginning craftsmen should not engage in beading for more than 1 hour a day. It's a lot of eye strain. Even if a person has excellent eyesight, it can deteriorate if this rule is neglected.
Many have seen a Japanese tree in gardens and parks - sakura, which is distinguished by the extraordinary beauty of its pale pink flowers. You can bring a piece of Japan into your home if you make a sakura tree out of beads. Despite the simplicity of making this little tree, creating such a craft will require you to be attentive, perseverance and patience, since you have to repeatedly do monotonous work. But the efforts expended will not be in vain: such a Japanese tree will harmoniously fit into the interior of your home.
Crafts from beads - sakura tree: master class
Before making sakura from beads, you need to prepare the following materials:
- wire;
- plastic plate;
- 50 grams of pink beads (dark and light shade);
- 15 grams of green beads;
- gypsum;
- winding thread;
- PVA glue;
- acrylic paints;
- tassel;
- floral tape or masking tape (optional)
- gypsum;
- form for a tree: a box for storing jewelry, flowerpots or any other stand that has an original design).
If you want to get a sakura from beads, then the pattern of its weaving is as follows:
How a branch of sakura is created from beads can be seen in the following photo:

After you have studied the basic weaving patterns, you can proceed directly to creating a tree.
- We begin to weave branches. First you need to mix pink and green beads.
- We take a piece of wire about 70 cm long, step back from its edge by 15 cm and make a small loop. Then you need to collect beads on the wire.
- At a distance of one centimeter from each other, we begin to knit leaf-loops, each of which has five beads strung.
- We twist the resulting roots.
- After we reach the mark with the loop, we need to complete the weaving. Next, you need to twist the resulting workpiece: for this, we fold it in half.
- We give the loops a shape, straighten them. Similarly, you need to make another 53 branches.
- Now we divide all 54 branches into groups: each should have six branches. There should be nine groups in total.
- Let's start creating the main branch of the tree. To do this, we twist three large blanks, each of which consists of 6 branches.
- We make three side branches, each of which includes two large blanks.
- Then we begin to fasten the side ones to the main branch of the sakura.
- We take masking tape or floral tape and wrap it around the tree trunk.
- Then we begin preparing a container for placing sakura.
- We fill it with plaster. We insert the main trunk of the tree into the plaster. We give time to dry.
- Now you need to decorate the container itself, in which the sakura is located. To do this, coat the gypsum with glue and pour the remaining beads on it. In addition to beads, the base can be decorated with small pebbles, sand, glass beads, etc.
- After the whole craft has dried, we can happily conclude that the beaded sakura is ready.


If you are not satisfied with the tree trunk, then you can make it thicker using plasticine.
We present to your attention a master class on making cherry blossoms from beads with your own hands. Despite the external complexity, even beginners can do it with their own hands, the main thing is to follow the detailed description and weaving pattern with a photo.
Tools and materials Time: 120 hours Difficulty: 5/10
for wood No. 1
- 30 g of pink beads with a diameter of 3 mm;
- 30 g of white beads with a diameter of 3 mm;
- copper wire with a cross section of 2 mm, 3 mm.
for wood No. 2
- copper wire for beading;
- matte glass beads of white, pink and pale green;
- scotch;
- wire cutters;
- beige threads;
- scissors.
for wood №3
- pink beads - 1 gr.;
- brown beads - 4 gr.;
- concave sequins "Flower", color pink mother-of-pearl - 3 gr.;
- large multi-colored beads - 10 gr.;
- wire - 30 cm;
- monofilament or thin fishing line;
- needle for beads;
- scissors.
How do you look at adding a bit of Japanese flavor to your interior? And what could be better than sakura from beads. This flowering tree will decorate your home all year round!
Beads are an almost universal material for needlework, from which you can make a lot of interesting things, from jewelry to stylish interior decorations.
In our master class, we will look at three ways to weave sakura from beads with our own hands. Both options are easy to make, but for beginners, tree pattern number 2 is more suitable.


Cherry blossoms are fleeting, but a tree made of beads with your own hands will delight you all year round. And if we consider this product as a gift to dear people, then it simply will not have a price.
Sakura No. 1 - step by step description
Getting started on weaving sakura from beads, follow the prompts in the above diagram. To enlarge it, just click on the photo.
The scheme of assembling sakura from beads

Step 1: make twigs
The diagram shows in detail all the stages of creating branches from beads. But if you still have questions, let's look at the scheme of how the beaded sakura is made in more detail.
Let's figure it out together
To create the top of the twig, you will need a piece of wire. Its length should correspond to the triple length of the future tree. Do not forget that the wire will be bent, twisted and wrapped many times, so do not spare it and then the product will turn out to be more attractive.
After we have decided on the sizes, we proceed to stringing the beads on the wire, 3 pieces for the top three branches. Constantly count the number of turns of wire, the equal length of the branches will depend on this. Then proceed to the side branches. One of them should contain five beads, the other only three. The next two branches are executed in exactly the opposite way, i.e. leaves in five beads are located on the other side of the branch. The final row contains leaves of three beads.
After all the leaves are in place, we proceed to carefully twist the entire branch as a whole. The remaining long end of the wire is simply left untouched. It is useful for the formation of two, larger branches of the tree.
We carry out two more branches with leaves. Then we connect them into a single, thicker tree branch. There should be five such branches. We, in turn, collect them into a common branch, which will later form the trunk of the sakura.
To create a lush tree, you need to make 70-100 branches. Attach all received branches to the trunk. Wrap the middle ends of the wire well with the remaining ends of the upper branches. Try to arrange the coils of wire as close as possible to each other. These actions will make it easier to work on covering the trunk with a tree with any of your chosen materials.
After forming the tree table, be sure to make sure that the remaining ends of the wire are enough to secure the entire tree to the base. Very often, needlewomen do not think about this stage and make mistakes that lead to the disclosure of already processed and painted trunks. After all, the insufficient length of the "roots" leads to a constant fall of the product.
The tree trunk can be wrapped with brown wire or thread, you can also use masking tape, which is then painted brown.
You can make the barrel from papier-mâché, and then paint it in your favorite or suitable color. Also, tree trunks, molded from pliable materials, such as plasticine, mastic or gibs, look great.
Step 2: make the base
Well, our flowering tree is ready. "Plant" it in a pot (vase) with plaster, plasticine or other hardening material. From above, decorate the "ground" with whatever you like. These can be beads of various diameters, pebbles, etc.
Instead of a pot, you can use beautiful coasters, both made of wood and handmade. It is only necessary to firmly fix the tree on the surface and hide the fixation points. A beaded sakura tree will be a great decoration for your home!
By the way, if you use beads of a different color range in your work, you can create different trees. For example, take brown, gold and some green beads and get an autumn tree.
We hope that the master class with step-by-step photos will help you create a magnificent decoration for the interior with your own hands.
Beaded Sakura for Beginners
Sakura No. 2 - step by step description
Sakura for beginners in the second version looks very bright! Making such a tree is not particularly difficult, but still it is quite a time-consuming and tedious process, so please be patient!
And remember, do-it-yourself sakura made from beads brings joy, a sense of comfort and harmony to the house.

Step 1: Making the Leaves
To make a tree 15 cm high, cut from a skein with wire 70 cm.
Mix in a shallow bowl glass matte beads of 3 colors: pink, white and pale green.
Step back 20 cm from the end of the wire and make a loop. Next, string the beads on the long end of the wire, alternating colors.

Step 2: make flowers
Make the first leaf by adding beads to the wire in turn in this order: white, pink, green, white and pink. Fasten the bottom of the wire into the sheet by making a few turns.

It is now that the tree becomes like a sakura. Step by step photo for beginners, it is really a good help.
Step 3: assemble into bundles
Make a second leaf, for which separate a small piece for a branch from the wire. Add 5 beads to this piece in the same sequence as written in the second step. Next, fix this piece into a leaf, for which make several turns at the bottom of the wire and 2-3 turns along the axis of the sheet.

Make the third and fourth sheets in the same way. Fold all leaves from 5 beads, alternately changing colors, but if small beads come across, you can form a leaf from 6-7 beads.


Step 4: form the branches
This is what the finished branch looks like.

Step 5: Making Big Branches
Collect twigs in bunches of 14 pieces.

Secure each bundle with tape and wrap it with a beige thread.

Connect all the bunches into a tree. Wrap the tree trunk with beige thread, stepping back a little from the top so that the branches are slightly visible.

Step 6: Making the Trunk
Trim the bottom of the tree.

Place the sakura in a beautiful flowerpot and fill it with plaster. Additionally, decorate the flowerpot with beads and beads in the color of the tree. Ready!
As you can see, our sakura master class is not difficult even for beginners. In general, fantasize and translate your inventions into wonderful crafts. We wish you good luck!
Unusual sakura from beads
Sakura No. 3 - step by step description
Let's look at a slightly unusual beaded sakura, which is not inferior in beauty and originality to the beaded trees described above. Such an interior decoration will transform your room and give a lot of little sunbeams when light hits it. Our sakura is suitable for both beginner needlewomen and experienced craftswomen.
We prepare everything you need:


Read in the article below how to create sakura from beads, the master class describes in detail all the main steps.
Step 1: Preparing the base for mounting cherry blossoms
We take a wire, it can be thicker, and bite off 30 cm. We form a circle and string large beads on it. We alternate colors so that our beaded sakura has a beautiful and bright base - a frame.

We twist the ends of the wire in a spiral and carefully bend in the shape of a loop. We hide the rest of the material in neighboring beads so that it is not possible to see them or prick them.
Step 2: Weave a beaded tree
Sakura is made in a simple mosaic technique, i.e. beads are located between the elements of the previous row. Thus, the fabric of the main trunk and the separating branches is woven.
We collect 8 beads on a monofilament with a needle, then we insert the needle into the 5th bead in a row. We dress the 9th bead. We insert the needle into the third bead from the beginning, then we string the 10th. Insert the needle into the first bead.


We string 11 - th and 12 - th on a monofilament and continue weaving sakura from beads.
Tree trunk execution scheme

After a few centimeters of weaving the trunk, we move on to making a thick sakura branch. We perform it according to the same scheme, but with a shift of one bead towards the base.


We attach the tree trunk to our base. If all sizes match, then sew it to the base. We perform hidden knots so that nothing stands out and sticks out.

Step 3: Execute Tree Branches
After a large part of the branch, we smoothly move on to thinner branches. We carry them out from the corners of thick branches formed during weaving. Thin branches consist of only one row of beads strung on a thread.

Remember that the branches, whether thin or thick, must be passed through the needle twice. Only after this can we confidently say that the branches during the operation of the product will not blossom and will not fall off the base.
We carry out the second thin branch of the tree.

We pass to the opposite side of the tree. We carry out the second thick branch, then weave small branches.

We carry out the third thick branch and smaller branches.


Step 4: We complete the branches of the tree.
Deliberately randomly build tree branches from beads. Sakura only in this case will look like a real tree, because in nature trees are rarely symmetrical and equal.


We fix each branch on the base and additionally thread the needle into large beads for strength.
Step 5: Making Flowers
So the simplest and most joyful stage in the implementation of our product has come. After all, nothing pleases the needlewoman so much as the final work, which pleases the eyes and gives only positive emotions.
We start sewing sakura flowers to the trunk and branches of the tree. To do this, take pink beads and sequins.
We sew elements, both from the front side and from the wrong side. Although in this product all sides are equal, and if there are any flaws, they are easy to hide in flowers.


Beautiful and such an unusual sakura is ready! We hope that our master class fully revealed the topic of how to create sakura from beads, and step-by-step photos served as excellent accessible material for additional perception. Create exclusive, dear to the heart, products and then your house will be a full bowl!


We also bring to your attention several video tutorials that will help you better understand the process of making such trees from beads.
sakura beaded video
And in the video below, you can look at the wonderful variety of beaded sakura and get new ideas for yourself!
Similar content
Beading is one of the most ancient types of needlework. At all times, small beads were used to decorate clothes, hats, and interior items. In particular, trees are very popular with craftswomen, for example, sakura, a master class on the manufacture of which we want to present in this article. In the photo you can see that the cherry blossom tree is very different in the performance of different masters. It all depends on how the author sees it.

Sakura from beads: master class
To create such a beautiful decoration for the interior, like sakura from beads with your own hands, the craftswoman will need a lot of inspiration and diligence. This work is not easy.
Materials for weaving sakura
- Beads (2 shades of pink or pink and white);
- Beads (green) - 10 grams;
- Copper wire (diameter 0.3 mm) - 60 meters, and wire with a diameter of 2 mm;
- A pot (where to “plant” a tree), or a mold;
- Alabaster;
- Scotch masking;
- Foil;
- PVA glue;
- Decor (pebbles, beads, rhinestones, grass, etc.);
- Acrylic paint (green, brown).
weaving sakura

Step 1
Future branches of sakura are woven. In the figure below, sakura from beads: a pattern of weaving twigs


It is necessary to mix pink and white beads. Each branch takes 50 cm of wire. We string 6 beads on the wire and make a loop. The wire is twisted several times (about 1 cm) and 6 beads are collected again. So we need to do 11 times. You can also add green beads to some leaves - it will create the effect of leaves.


These blanks should be about 80-90 pieces.
Step 2
After making the blanks, you need to start interlacing them with each other in three branches. In this way, all small blanks are intertwined. Let's call them basic.

Step 3
Collecting branches.
For the topmost sakura branches, 2 main blanks are intertwined.

For the middle of the sakura, we intertwine 3 main blanks - 3 pieces.

For the lower branches of sakura, we intertwine 5 main blanks - 3 pieces.

Step 4
We collect the trunk of the sakura tree.
Here we need a thick wire.
First, the upper branches are wound on it. Then the thick wire is wrapped with masking tape.


The middle branches are screwed a little lower, and the wire is also wrapped with tape.

The lower branches are also screwed here and again everything is wrapped.
Step 5
The tree wrapped with adhesive tape is installed in a pot or on a mold and filled with alabaster bonding solution. We wrap the branches with beads with foil - so as not to stain them in the next step.


Step 6
At this stage, it is necessary to coat the tree trunk with a special solution:
- a tablespoon of alabaster
- 1.5 tablespoons of PVA glue
The consistency of the solution should be like a pancake batter. The tree is coated with a solution and put to dry.

Step 7
The trunk of the tree is covered with brown acrylic paint, the base on which the tree stands is green. For the base, you can also use artificial grass. We scatter beads on the “grass” (they will stick if the base is varnished).

Step 8
After drying, you can remove the foil. The twigs straighten out, a form is created.

The sakura tree is ready! Remember that it is an ancient symbol of Japan. It reminds of the transience of time, and at the same time is a symbol of female youth, beauty and, in general, youth. Such a tree will perfectly fit into the motifs of oriental interiors. Or, in the atmosphere of a tender room of a romantic girl.
Video lessons
Trying to attract prosperity to the house, we go to any tricks. Of course, everyday work and service to family values is, of course, important. But, having learned about a new way, even if symbolic, to bring good, spiritual or material, into the house, we immediately rush to put it into practice. One of these ways is beaded money tree which, according to giving, contributes to the easy enrichment of the house and its inhabitants.

A beaded money tree will bring good luck and harmony to the owner's home.


Red color will give energy and cheerfulness. Especially by the way, this tree will be in the workplace, near the computer, phone.

A small tree on a shell will remind you of summer on frosty winter evenings and will give you a great mood.

A beaded money tree in golden color brings… Guess what? Of course money!

A beautiful beaded flowering tree should be protected from dust, direct sunlight and annoying guests, who, as soon as they find out that you yourself created this miracle, will certainly want such a charm for themselves.
Beadwork is a very popular type of needlework today. Such interest in it is explained by the fact that, firstly, this activity develops perseverance and patience in us, helps to relax and calm down. After all, when working with beads, you will not rush and get nervous, because in return you can get a failed product. Secondly, bead weaving is a very exciting activity, because before your eyes a real work of art grows from small beads. And thirdly, such trees contain a deep philosophical meaning, and their possession symbolizes many different values that are important for a person.

These are the tools with which we will make our tree.

To create your tree from beads, prepare a wire, be sure to thin, needle nose pliers and beads.

Do not bend the wire, but just twist it gently to get rounded leaves of our bead tree.

Having strung 3-5 beads on each wire, hold the base of the “twig” with one needle nose pliers, and twist the wire at the base with the second.

Now the most crucial moment has come - we need to form the tree itself. To begin with, form the branches, then sequentially, as shown in the figure, twist the branches, separating a bead at the tip of each branch.

This is the kind of branch we should learn from.

Now it's up to the little things. We stick a tree into a wooden form (you can use wine corks for these purposes) and lower the branches down. like willow. However, you can leave the tree as it is - and so beautiful.
So if weave a money tree from beads, then it will certainly help to attract wealth to your home. The tree, symbolizing the tender Sakura, will not only decorate any room, but also give beauty to its women and joy to all the inhabitants, because that is what it personifies.

Sakura from beads will give happiness and joy.
The tree-symbol of Yin-Yang expresses the unity of two main opposites - male and female. The Love Tree will become an indispensable assistant in your personal life. If you give it to your loved one, then your feelings will only become more fiery and stronger. When you still do not have love, then such a tree will definitely help you find it. A Tree called Bonsai, as part of a centuries-old culture, can give the interior of your home a special warmth and individuality. And, most importantly, it is not necessary to buy such symbolic things. It will be even better if you make your own happiness with your own hands, both literally and figuratively.

Beaded bonsai will give confidence and warmth.
Beaded money tree: master class
If this is your first time making beaded money tree, master class, similar to which there are a lot on the Internet, will help you make a good beautiful symbol.

- So, first choose the beads that suit your color, get a flexible wire for the leaves of the tree.
- Cut off half a meter from the wire, string several beads on the cut. They should be placed in the center of the wire.
- Bend the wire in half, make a loop in which the beads will be fixed, twist the wire ends.

- Again, make a leaf by bending the wire with six strung beads, twist it.
- On the other side of the wire, repeat the same steps.

- Now fasten the ends of the wire and carefully twist it as in the picture.

- And the more branches, the more magnificent your tree looks.
- Now we are preparing the barrel - we wind the green tape or tape on the wire (thick or you can twist it a little thinner).


This is what a tree looks like. You can decorate it with toys and it will be a Christmas tree, or you can make flowers from beads or berries - then it will be a completely fruit tree.
Do-it-yourself beaded money tree
I can offer here such a detailed master class on how to make a tree from beads. It is quite simple and we will make a tree practically from improvised means - beads or stones, copper wire and a beautiful stone.

A beaded money tree will take from one to five hours of work. Moreover, at this time, the search for a stone is included, on which the roots will be attached.

But for the sake of such a beautiful tree, it is not a pity to spend an extra couple of hours of life. It will be a wonderful wedding gift as an addition to the main gift.

To make, you will need a dozen copper wires, each approximately 60 centimeters long.

Wind the "roots" of the tree on the stone and gradually form the trunk.

Gradually separate 3-4 wires - these will be our branches.

Now pick up multi-colored beads or semi-precious stones as in my version.

String beads on each branch and secure the ends with needle nose pliers.

Continue stringing beads on each branch.

Well, that's all - the tree is ready! Charm, isn't it?
Before assembling the tree, two branches are folded together, the wire is twisted near the base of the branch. Then take a thicker wire and screw two branches onto it to form a trunk. Such a ready-made money tree should be placed in a suitable container, you can use a flower pot. The tree needs to be covered with plasticine to match the color of the soil.

Bonsai Beaded Money Tree
It is possible, as you have already seen, make money tree from beads, or you can decorate it with coins or pebbles like precious stones. If you put two similar trees side by side, you will also get an interesting composition. This will enhance the effect of the talisman. When you fasten banknotes to branches, shake a tree, and money begins to crumble, this will simulate a money rain. And since like attracts like, money will come to money.
As we have already said - made DIY beaded sakura brings joy to the house, this is a female tree and it patronizes women. Even if you don’t really believe in omens, this tree alone fulfills 100% - it brings comfort and good mood with one of its bright and at the same time gentle appearance. shall we try to make it?

DIY beaded sakura is made mainly of pink and green beads, although green can be replaced with black, which will give the tree a unique charm.

String 85 beads on the wire (then you will need to form leaves of 5 beads each).

Now form the leaves of the tree, separating 5 beads from the main mass and twisting the wire several times at the base.

Continue rolling the leaves.

You should have 17 leaves per branch.

Now twist each leaf in pairs, leaving only the middle leaf without a pair.

Now gently “fluff” the branch, dividing the leaves.

Then press the leaves to the base of the branch, as if they were looking down.

Connect four branches into one.

Do the same with the rest of the branches.

Our sakura is ready, it remains only to successfully fix it.
DIY beaded sakura option number 2
This is not quite a beaded sakura, but rather a magical crystal tree, which just asks to bloom on the windowsill to the envy of the neighbors. Stocked up on Swarovski crystals? No? Well, Czech beads will do.

String 9 beads on the wire.

Use needle nose pliers to twist them into a ring.

String 2 more beads to them.

Make another ring of 9 beads.

Add 9 more beads to everything.

And twist the ring again.

And again, two more beads on a common branch.

The next petal will consist of 11 beads.
And at the base, place 5 more beads.
![]()
Here we have an amazing crystal tree.
A simple weaving technique will help you create a symbolic masterpiece tree that will certainly attract incorruptible money luck to your home. Well, good luck to you!
bead tree photo

The tree near the computer will always please the owner and relieve internal irritation.
Birch from beads. almost like a real one!

Blooming spring tree

You can come up with a whole thematic composition for a tree made of beads for a stand. For example, shop...

...or a fence...

And even flowers!

Or you can decorate a beaded tree with butterflies.

The bright colors look very nice. autumn tree on a green lawn. nothing extra.

Cherry blossoms made of beads drop petals ... Insanely cute and a little sad. because they are still alive.
Romantic autumn tree made of beads.

A real weeping willow made of beads, just like a living one ...

Pink piglets settled among the cherry blossoms. Charm and only.

Kalina in the snow from beads. What a beauty!

Using colored sand bottles to base beaded trees is a great idea!

Apple tree from beads.

Sakura in bloom.

Money tree from beads and beads.

Appetizing bananas on a beaded tree.


It is also fashionable to use the bark of a real tree as a stand. It will not be superfluous to cover it with varnish.
The beaded tree glistens like crystal.

And the cherry blossoms are in bloom again.

Trees can be made from semi-precious stones using the same technique as from beads.

A tree in the sand from a seashell vacation is a real sea adventure.
Bright, colorful and juicy stone tree.
Delicate flowering apple tree.

And sakura again!

Money tree made of beads in the shape of a pendant.
Amethyst money tree.

Bead amulet tree
Beaded trees in colored sand.
Beaded money tree video: