Consider how you can connect a TV to a computer or laptop via a LAN cable directly without using a modem / router / router.
First of all, you need the TV to have a LAN output and support DLNA.
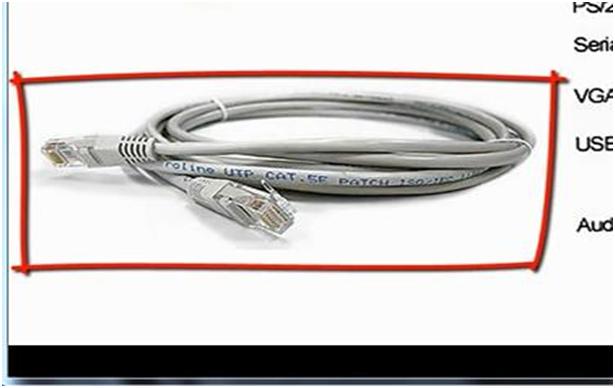
The same output should be in a laptop or computer. Also, we must have network cable with RJ45 connectors, which are used when connecting to LAN ports. It will be needed to connect the TV and the computer to each other.
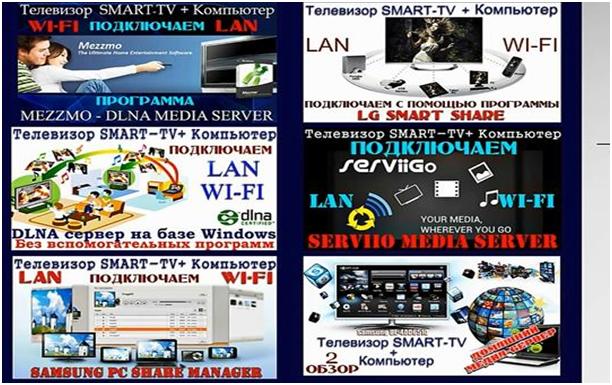
Any media server must be installed on the computer. Below in the image you can see the most popular media servers. Tutorials on how to install them are available on the Internet.
After we have everything installed and connected, we find an icon on the taskbar on the right, as in the image below.
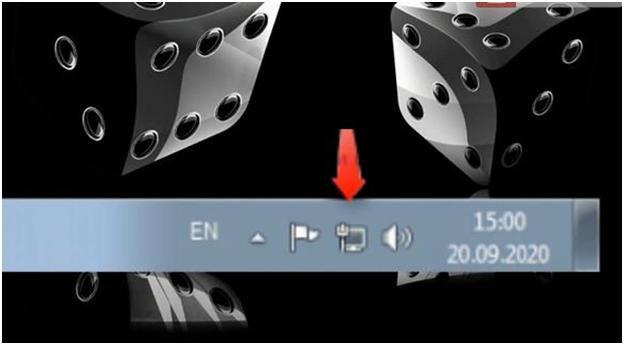
This icon indicates the presence / absence of a network.
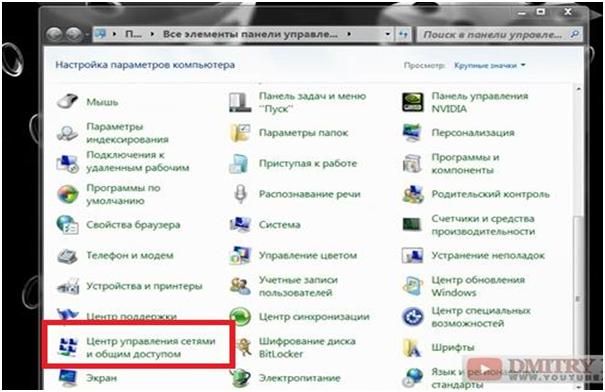
Right-click on this icon and select "Network and Sharing Center".
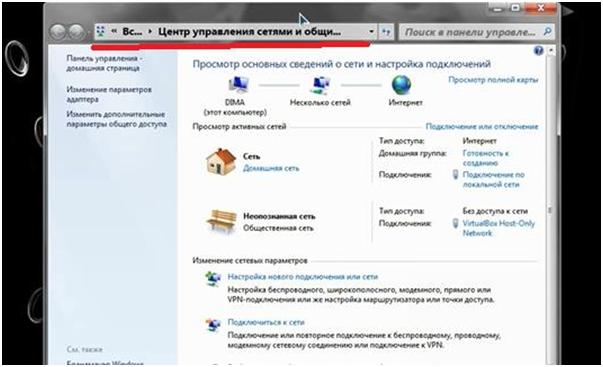
If you do not have such an icon, then go to the Start menu. Select "Control Panel". Then go to "Network and Sharing Center".
As a result, we get to the same page as in the first method.
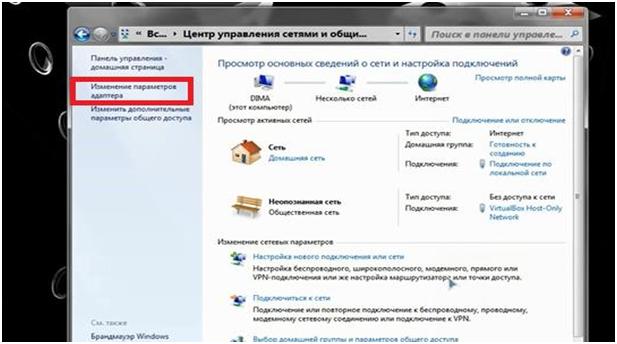
We get to the next window. In it, select the icon "Local Area Connection".

Right click on the icon. In the context menu that appears, select the "Properties" section. Here we select the subsection "Internet Protocol version 4 (TCP / IPv4)".
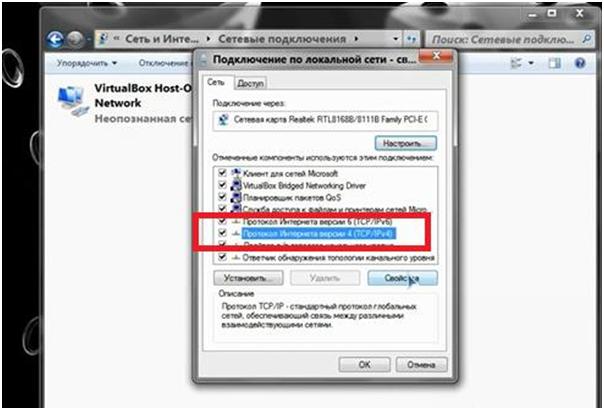
Click on the "Properties" button, which is located a little lower to the right.
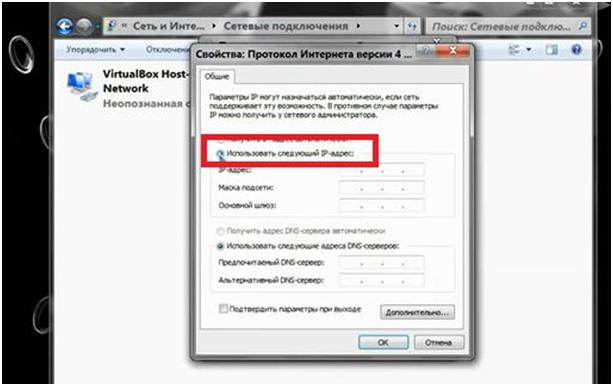
On the lines below, you will need to enter the following values. See image below.
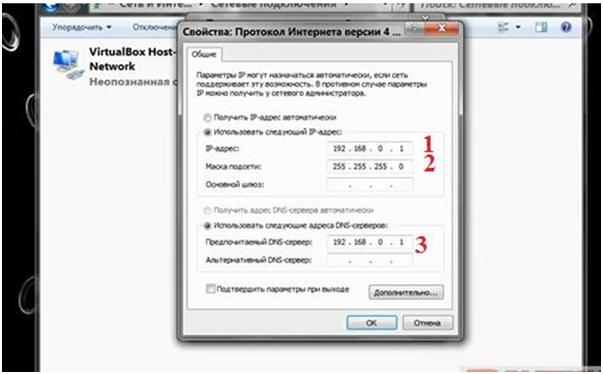
In the line under the number 1 "IP address" enter 192.168.0.1
In the line under the number 2 "Subnet mask" enter 255.255.255.0
In the line under the number 3 "Preferred DNS server" enter 192.168.0.1
We press the "OK" button.
After completing the settings, we check that we have a media server running. Then we move on to TV.
Let's see how to create a DLNA server based on operating system Windows 7, Windows 8, Windows 8.1 without the intervention of any additional software.
First, let's take a quick look at what DLNA is. This is a set of standards that allow DLNA-compatible devices (computers, laptops, tablets, smartphones, some media servers, even some models of cameras and camcorders, TVs, game consoles, audio systems) to transmit and receive various media content. The connection can be either wired or wireless.
To connect devices, you will need to create a local network.
We pass to the computer. We enter the Start menu. Select the "Control Panel" item.
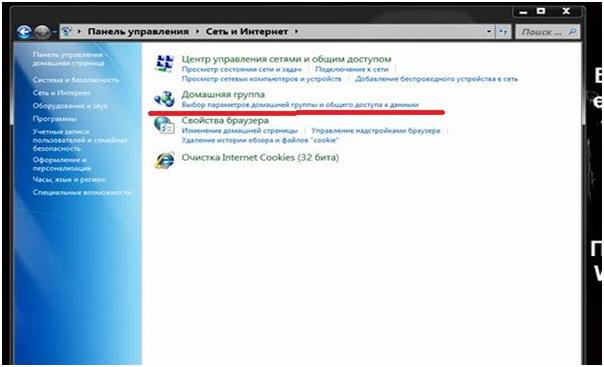
Click on this line.
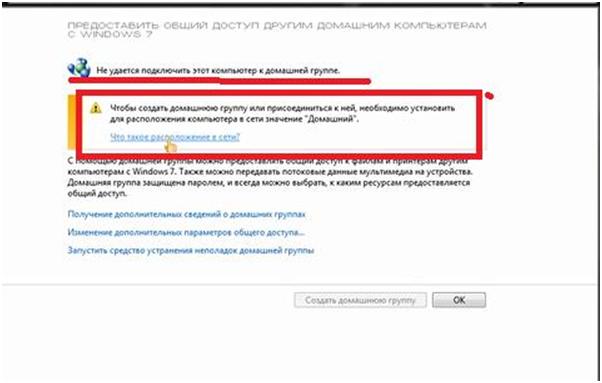
If anyone sees a window with a warning "This computer cannot join the homegroup", then you can follow the link marked in the image below in the red box. The link is called "What is a network location?"
If you did not have the specified warning, then immediately click "Create a home group". And click the "Next" button.
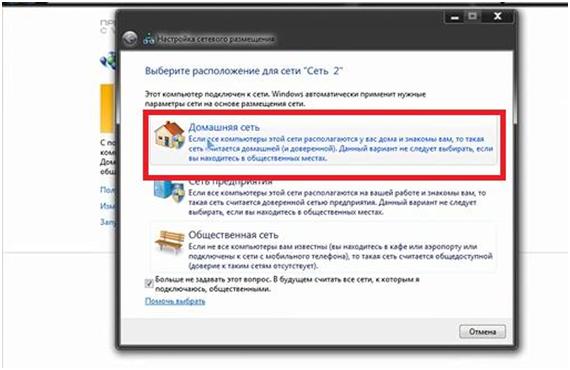
In both cases, the following window will appear.

Here you need to choose what we want to share. After selection, click the "Next" button.
A window will appear in which we will be asked to write down the password. Write it down or copy it somewhere.
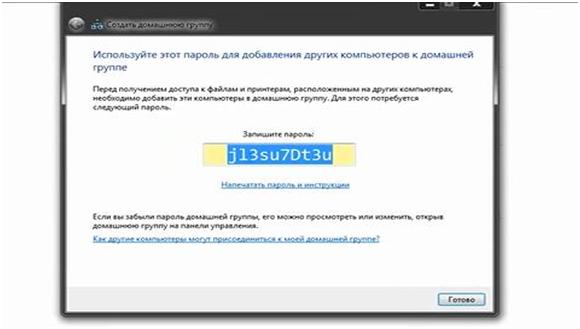
We press the "Finish" button.
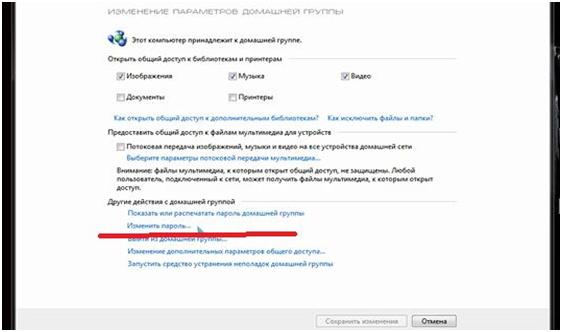
Let's go to another window. Here you can change the password to a convenient one for us. You can do this by clicking on the "Change password..." link.
We click on the link. A window will appear. In it, pay attention to the warning: “When changing the password, make sure that there are no computers in the homegroup that are in sleep or hibernation mode. After changing the password, enter the new password on each of the HomeGroup computers."
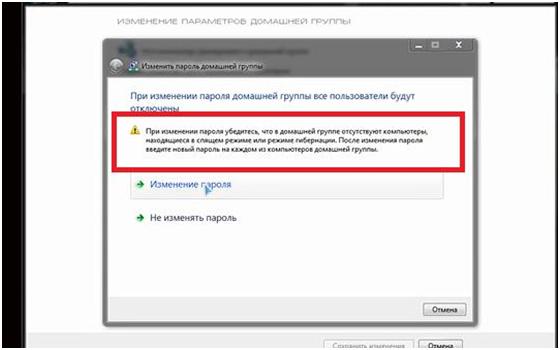
Now click on the "Change password" line. In the window that appears, enter the new password instead of the old one. We press the "Next" button. A window will appear again in which we will be asked to write down the changed password. We press the "Finish" button.
This completes the first DLNA server setup. Devices can access information stored in Windows Libraries.
Internet connection and additional applications turn the TV into an interactive multimedia device in the home living room. However, for this to be possible, it is necessary connect the TV to your local network.
However, each of these features requires . In this case, it becomes possible to transfer through your home network materials such as photographs, films and music from computer to TV.
Even updating the firmware (firmware) for the receiver Smart TV can be done using the local network. therefore connecting the TV to the local network, becomes as essential as a satellite dish or power socket.
A Smart TV Receiver Connector is a Must
Via connector, network receiver Smart TV, establishes contact with the router on the Internet and with all other devices connected to the home network, such as a computer or a NAC server containing a collection of music and movies.
TV type Smart TV capable of not only calling data from the Internet, but also playing digital content from devices within the local network and exchanging multimedia content with these devices.
Most Models Smart TV are equipped with a connector through which you can connect them to a wireless LAN. In addition, it is possible to connect the receiver to a wireless network. WLAN. Some TVs have a built-in WLAN intended for this purpose. Others connect to the network through an external module WLAN in the form of a USB key.
It is best to connect the TV to a router or ethernet switch using a standard network cable. Traditional cable connection ethernet provides high data transfer rates. In addition, it is almost insensitive to interference.
Even Full HD (1080p) video can be streamed from your computer to your TV with a network cable without fear of stuttering during playback. Moreover, such a connection is more secure, because it allows you to create a closed network loop that will not be accessed " uninvited guests» - provided that the router is configured correctly.
A huge disadvantage of a fixed-line network is the need to run a network cable to the TV.
Wireless connections in your home network
Wanting to connect your TV Smart TV to the local network and to the Internet, it is not at all necessary to stretch the cable, and even more so to install sockets in the walls. A wireless network will give you more freedom when setting up your TV. Radio network connection WLAN turns out to be extremely practical, especially since most homes have a router, so the amount of work is limited to configuring the wireless network settings on the TV.
In some TVs, modules WLAN installed inside the case, in others they are connected via an additional external module. The last of these is simply inserted into the USB connector, and then configured from the TV menu. In addition to the type and location of the card WLAN, both of these options do not differ from each other in terms of use.
If you are going to purchase a module WLAN in the USB version, determine the model recommended by the manufacturer for your TV. Although you can connect to the USB port and any other USB key with a network adapter WLAN, but you may encounter compatibility issues with the TV's internal software driver.
The problem is that every USB device has a manufacturer ID assigned permanently. Based on it, receiver manufacturers Smart TV have the ability to determine the manufacturer of the module, and in software TV, for example, to block other people's cards WLAN.
When connecting your TV to a wireless network, you must keep in mind that the wavelength range WLAN depends to a large extent on local conditions. Wave propagation WLAN indoors, rebound phenomena associated primarily with metal, reinforced concrete and glass elements, as well as plasterboard partitions, are prevented.
Reliable home network from a power outlet
If networks ethernet scare you with their tangles of wires, and the wireless network WLAN you seem too sensitive to interference, you can transmit data over the network ... the electric current of your apartment. Indeed, solutions of this type power line or HomePlug– not so many, and they are less resistant to interference, however, in the case of short distances, this should not have an effect on data transmission.
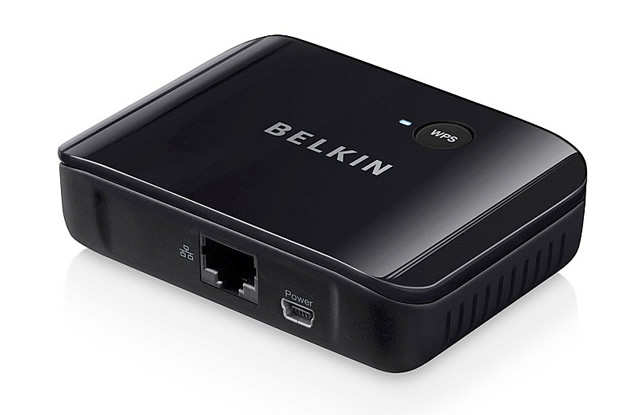
Great network advantage power line – simple installation. Convenient network modules, which in their shape and size are very reminiscent of Charger mobile phone, must be placed in the power sockets. After that the modules power line are usually ready to go.
One of the modems power line connected by cable ethernet to the Internet router, and then placed in the nearest power outlet. The second modem is connected in the same way to the TV and the outlet. This is enough to establish a connection to the TV through the house's power system.
Data transfer rate in networks power line exceeds the data transfer rate in networks WLAN. When using the HomePlug AV standard, you can theoretically receive a transmission of up to 500 Mbps. Maximum performance when using the new HomePlug AV2 standard reaches 1 Gbps. However, in both cases, the actual data transfer rate depends on the quality and properties of the system wires.
Although networks power line perceived as safer than wireless WLAN, but they do not achieve the same level of security as cable networks ethernet. According to manufacturers, the data flow is interrupted at the energy consumption meter.
Despite this, it is recommended to secure your network power line by setting a password. This is especially justified in apartment buildings. If the current is distributed correctly within the house, the neighbor will not be able to capture your data, because the electricity meter is placed at the end of the household electrical circuit, representing an insurmountable barrier to the flow of transmitted information. However, the average user cannot independently check the distribution of electricity in his home.
Home Plug modems handle multiple phases - provided all three phases are running in parallel across all sites. In older buildings this is not so obvious. So, if the control LEDs signaling readiness ethernet networks do not light up, this should not mean a failure of the modems power line.
In this situation, a phase-to-phase connector, which is sold in electrical stores, may be the solution to the problem. Remember, however, that this type of device must be installed by a qualified locksmith.